Tag Archives: just cooking

Mark Doe’s Guide To Great Barbecuing

.

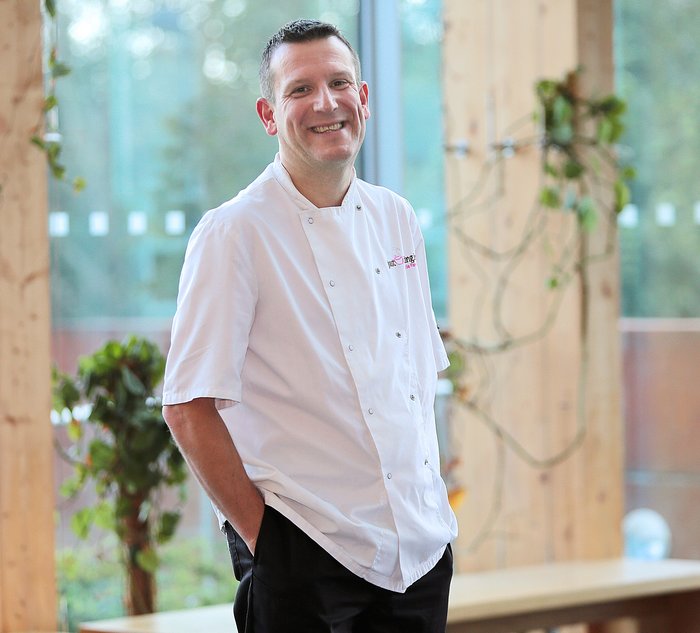
Mark Doe of Just Cooking Cookery School in Firies gives his tips on great barbecuing…

In Ireland we only barbecue on average around two times a year, and when we do the most popular item cooked is black sausages!

During my training  we cooked amazing foods on the BBQ including beer can chicken, garlic flat breads, pizza, mushroom risotto, pulled chicken burgers with bacon jam, chocolate cake with grilled orange mascarpone, stuffed mushrooms and even sticky toffee pudding.

I barbecue all year round and tend to use my barbecue more than my oven when it comes to cooking at home.

Gas Vs Charcoal is a question I often get asked, and really they both have their advantages and disadvantages.

Continued below…

.

When buying a BBQ, buy the best you can afford, as if looked after they have a longer life span.

Cleaning your BBQ isn’t as hard as you think. The best way to clean the grill is to burn the debris off.

So get the BBQ grill hot before cooking and then brush with a wire brush. Clean the rest of the BBQ with warm soapy water.

We run two types of BBQ cookery classes at Just Cooking, our evening demo class and our hands on classes. For more information see our website www.justcooking.ie

Cooking methods

Direct Method

Food is cooked directly over the heat source. For even cooking, food should be turned once halfway through the grilling time.

Use the direct method for foods that take less than 25 minutes to cook: like steaks, chops, kabobs, sausages and vegetables.

Direct cooking is also necessary to sear meats. Searing creates that wonderful crisp, caramelized texture where the food hits the grate. \

It also adds nice grill marks and flavor to the entire food surface. Steaks, chops, chicken pieces, and larger cuts of meat all benefit from searing.

To grill by the Direct Method on a charcoal grill, spread prepared coals evenly across the charcoal grate.

Set the cooking grate over the coals and place food on the cooking grate. Place the lid on the grill and lift it only to turn food or to test for doneness at the end of the recommended cooking time.

To grill by the Direct Method on a gas grill, preheat the grill with all burners on High. Place the food on the cooking grate, then adjust all burners to the temperature noted in the recipe.

Close the lid of the grill and lift it only to turn food or to test for doneness at the end of the recommended cooking time.

Indirect Method

The Indirect Method is similar to roasting, but with the added benefits of that grilled texture, flavor, and appearance you can’t get from an oven.

Heat rises, reflects off the lid and inside surfaces of the grill, and slowly cooks the food evenly on all sides.

The circulating heat works much like a convection oven, so there’s no need to turn the food.

Use the Indirect Method for foods that require 25 minutes or more of grilling time or for foods that are so delicate that direct exposure to the heat source would dry them out or scorch them.

Examples include roasts, ribs, whole chickens, turkeys, and other large cuts of meat, as well as delicate fish fillets.

To grill by the Indirect Method on a charcoal grill, arrange hot coals evenly on either side of the charcoal grate.

A drip pan placed in the center of the charcoal grate between the coals is useful to collect drippings that can be used for gravies and sauces. It also helps prevent flare-ups when cooking fattier foods such as goose, duck, or fatty roasts.

For longer cooking times, add water to the drip pan to keep drippings from burning. Place the cooking grate over the coals and place the food on the cooking grate, centered over the drip pan or empty space.

Place the lid on the grill and lift it only to baste or check for doneness at the end of the suggested cooking time.

To grill by the Indirect Method on a gas grill, preheat the grill with all burners on High. Then adjust the burners on each side of the food to the temperature noted in the recipe and turn off the burner(s) directly below the food.

For best results, place roasts, poultry, or large cuts of meat on a roasting rack set inside a disposable heavy-gauge foil pan. For longer cooking times, add water to the foil pan to keep drippings from burning.

Cooking with charcoal

Do not be tempted to fill the Barbecue full of charcoal in the hope of making a bigger, longer lasting fire. It is simply a waste of charcoal and it will become too hot to cook on.

• Remove the lid if there is one and open all vents on the barbecue.

• Spread the charcoal briquettes 2 layers deep over the base of the barbecue.

• Scoop it back into a pyramid and tuck in the fire lighters.

• Light the fire lighters and leave for 20-25 minutes  until the coals start to glow red.

Cleaning your BBQ

The best time to clean your BBQ is when it is hot. I know the last thing you want to do after eating (and a few glasses of wine!!!) is clean up, but it is easier whilst the BBQ is hot.

I use a wire brush to clean of any stuck debris on the grill.

If you have a gas BBQ light it for a few minutes for the grill to dry through.

Gas Vs Charcoal

Gas is easier to use as it can be lit quickly.

Charcoal is said to give the food better flavor.

The key to using gas and getting that charcoal flavor, is to cook the food with the lid down. This captures the smoke and gives you a great flavor.

Buying a Barbecue

When buying a barbecue you really do get what you pay for.

Cheap gas barbecues are never really hot enough to cook plenty of food on as they may only have one burner.

Also cheaper barbecues tend to rust quickly.

Keep the barbecue in a shed during the Winter months.  During the Summer when it is outside keep it covered.

Recipes

BBQ pork chops with prosciutto and sage

Serves 4

Ingredients 

4 Boneless pork loin chops

Sea  salt

Freshly ground black pepper

4 paper-thin slices prosciutto (Parma ham)

Extra-virgin olive oil

Sauce

3 tablespoons unsalted butter

1 tablespoon finely chopped fresh sage leaves

1 tablespoon fresh lemon juice

Method

Using a sharp knife, butterfly each pork chop by making a slit halfway up the one side of the escalope and enlarging the slit to extend to within ½ inch of the opposite side.

Do not cut all the way through. Open each escalope like a book. Season the inside with salt and pepper.

Lay one slice of prosciutto inside escalope, folding the prosciutto to fit, if necessary. Close the escalope and press tightly. Lightly brush the outside of the each one with oil and season evenly with salt and pepper.

Brush the cooking grates clean. Grill the pork chops over  a medium heat with the lid closed, until nicely browned on the outside with just and then turn.

Cook until a core temperature of above 75c is reached and the juices of the pork run clear. This will take approx. 8 minutes in total minutes Meanwhile, make the sauce.

In a small saucepan over medium heat, melt the butter and cook until bubbly, 2 to 3 minutes. Add the sage and cook for about 1 minute.

Remove the saucepan from the heat. Allow the butter to cool for about 1 minute. Add the lemon juice to the melted butter, and then immediately spoon the sauce over chicken Serve right away.

Citrus marinated chicken fillet with grilled onions
Serves 6-8

Ingredients

1 tablespoon finely grated lemon zest (from about 2 lemons)

50ml fresh lemon juice

50ml  fresh orange juice

2 tablespoons  soy sauce

2 tablespoons finely chopped fresh coriander leaves

1 tablespoon grated, peeled fresh ginger

Extra-virgin olive oil

4 boneless, skinless chicken breast halves, each about 6 ounces

1 red onion, about 12 ounces, cut crosswise into ½-inch-thick slices

1 teaspoon kosher salt

½ teaspoon freshly ground black pepper

Method

In a large, resalable plastic bag combine the marinade ingredients, including 2 tablespoons oil. Place the chicken in the bag, press the air out of the bag, and seal tightly.

Turn the bag to distribute the marinade, place the bag in a bowl, and refrigerate for 3 to 5 hours, turning occasionally.

Brush the onion slices with oil. Remove the chicken from the bag and discard the marinade.

Season the chicken evenly with the salt and pepper, and then grill over medium heat with the lid closed, until the meat is firm to the touch and no longer pink in the centre, 8 to 12 minutes, turning once.

At the same time, grill the onions until tender, 12 to 15 minutes, turning once or twice. Remove from the grill as they are done, and let the chicken rest for 3 to 5 minutes.

Cut the chicken crosswise into ½-inch-thick slices. Serve warm with the onions

Baby potato salad

Serves 4

750 g of new baby potatoes, washed 6 bacon rashers, cut into strips

1 red onion, peeled and finely diced 1 tablespoon of red wine vinegar

4 tablespoons of extra virgin olive oil 1 bunch of scallions

2 teaspoons of wholegrain mustard 1 tablespoon of chopped parsley

Salt and freshly ground pepper

Method

Boil or steam the potatoes until tender.

Drain and allow to cool.

Fry the bacon  in a frying pan until crisp, then add the red onion and cook until softened.
Remove from the heat and add the red wine vinegar, mustard, scallions and olive oil

Toss through the potatoes and season with salt and pepper.

Finish with chopped parsley.

Fish Tacos-Serves 6

350g cod fillet skinned and cut into cubes

350g salmon fillet cut into cubes
6 corn tortillas
For the salsa
4 on the vine tomatoes
4 spring onions finely chopped
1 garlic clove finely chopped
1 lime juice
1 tbsp extra virgin olive oil
Sea salt and freshly ground black pepper
For the dry rub
1 tsp paprika
1 tsp dried oregano
1tsp soft light brown sugar
1 tsp ground cumin
Pinch of salt

For the garnish
100ml sour cream
1 avocado
10g coriander
1 lime cut into small wedges

Method

Make the salsa by mixing all of the ingredients together.

Next make the dry rub by combining all of the ingredients in a small bowl.

Toss the fish in a little oil and then dust the fish with the rub.

Prepare the barbecue for direct heat approx 200c. Preheat a cast iron griddle pan on the grill.

Brush the plate with a little oil. Sear the fish for 3-4 minutes on each side.

Place on a warm plate and sprinkle with the coriander.

Very quickly grill the tortillas for a few seconds on each side.

To assemble fill each tortilla with a few chinks of fish, sour cream, avocado and salsa.
Fold and serve.

Cous cous salad-serves 10

200g of Couscous

400ml Boiling vegetable or chicken stock.

8 cherry tomatoes, left whole

1 courgette, cut into ½ inch chunks

1 red pepper, de-seeded and cut into a ½ inch dice

1 yellow pepper, de-seeded and cut info a ½ inch dice

1 large carrot, cut into a ½ inch dice

4 tbsp olive oil

Juice of  1 lemon

150g Feta cheese, crumbled
4 tbsp finely chopped flat parsley

5 tbsp extra virgin olive oil
salt and pepper to season

Method

Preheat oven to 180˚C.

Place the prepared vegetables and tomatoes in a very large roasting dish and spread out to a single layer. Drizzle with the  oil  and season with sea salt and pepper to taste. Roast for about 45 minutes or until the vegetables are tender.

Place the Couscous in a large bowl and cover with boiling stock.

Cover tightly with clingfilm and leave to stand for 9 minutes.

Remove the clingfilm  from the Couscous, add the extra virgin olive oil, lemon juice, parsley and feta.

Fluff up with a fork  and stir through the feta and  roast vegetables.
Season to taste and serve.

Mark Doe’s Recipes For A Delicious Christmas Dinner

.

Mark Doe of ‘Just Cooking’ Cookery School in Firies has recipes and tips to serving up an amazing Christmas dinner…
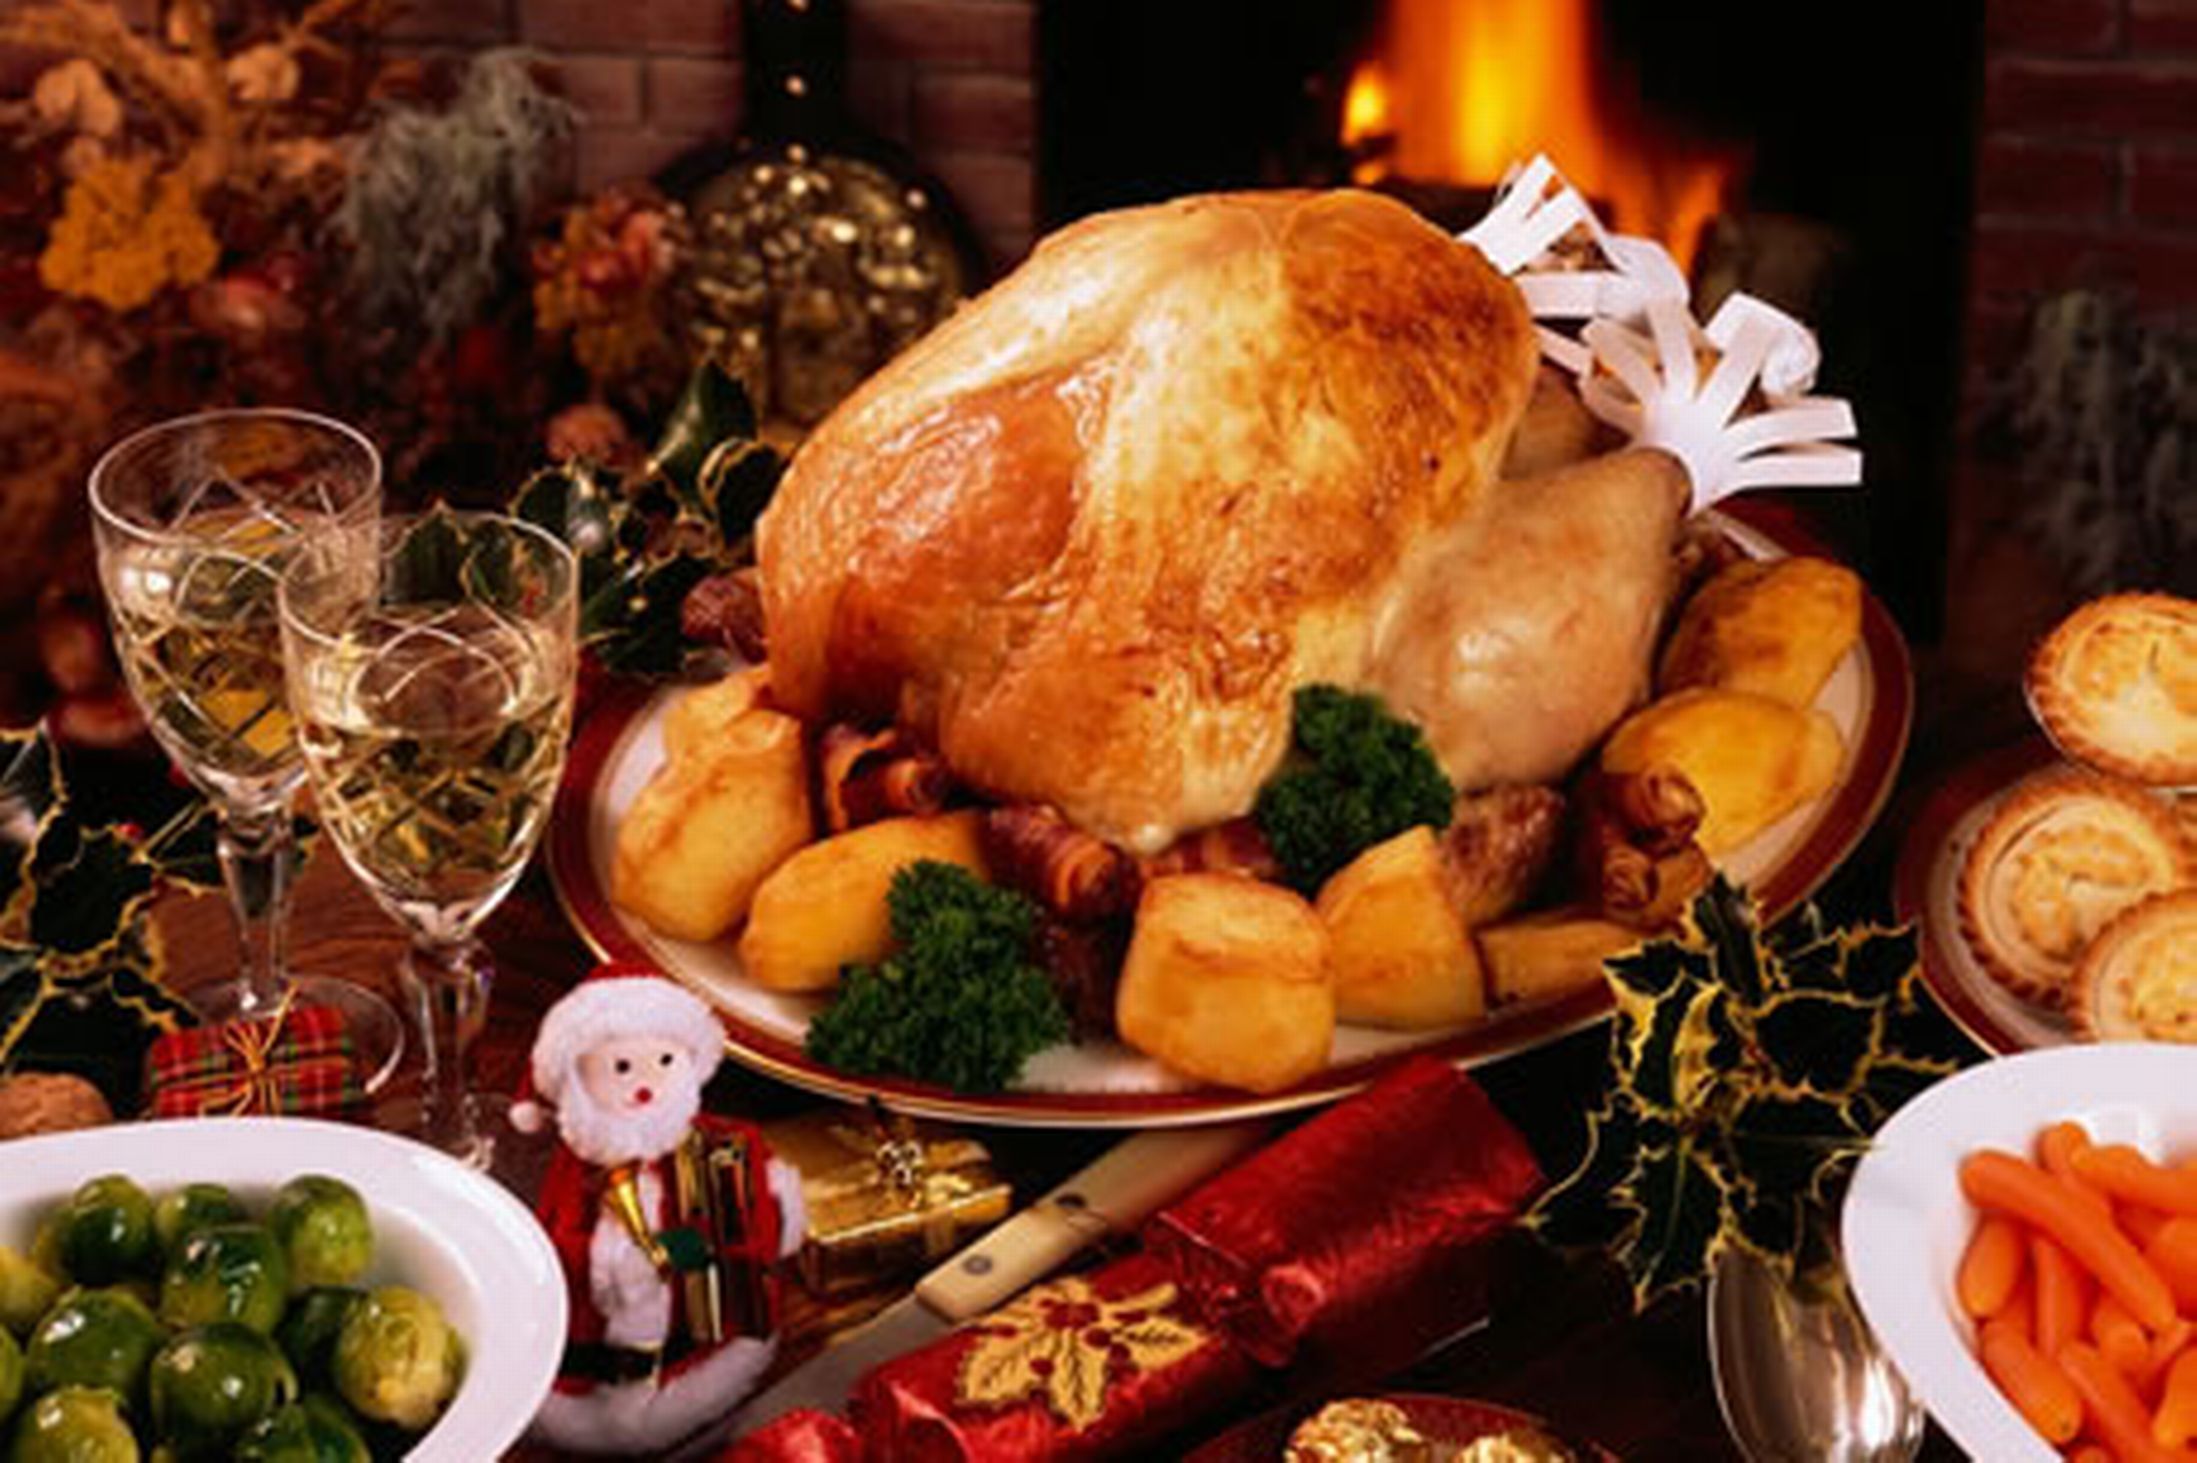
The key to a stress free Christmas lunch is preparation and timing. You want to be able to enjoy the day without being tied to the stove all day long. Below you will learn some tips to make your Christmas lunch as stress free as possible.

Turkey gravy

Serves 8-10

Ingredients

• 25g plain flour

• 2 tablespoons of red currant jelly

• Salt and pepper

• 600ml of chicken stock

Method

• Pour of the turkey juices into a bowl and allow too cool.
• Remove any fat from the top of the juices with a spoon or ladle.
• Remove the turkey from the roasting tray, and place the turkey on a medium heat.
• Add the flour and cook for 2-3 minute, stirring well to scrape the sediment form the tray and allowing the flour ro colour slightly.
• Gradually pour in the stock whisking well.
• Add the redcurrant jelly, bring to the boil and simmer for 2-3 minutes.
• Add the juices from the turkey, bring back to the boil and season with salt and pepper.

Perfect roast turkey

As a rule a 7kg (14-15lb) turkey will feed 10-12 people with left over.

Ingredients

• 1 x 7kg Turkey (14-15lb)

• 175g unsalted butter (soft)

• 1 Lemon, cut in half

• 1 large onion, peeled

• 2-3 bay leafs

• 4 garlic cloves cut in 1/2

• Few sprigs of fresh rosemary or thyme

• Salt and pepper

• 200ml white wine

• Stuffing (see recipe below)

Method

• Pre-heat your oven to 220c/Gas mark 7
• Remove the giblets from the turkey.
• Season the butter well with salt and pepper.
• Use your hands to loosen the turkey skin away from the breast, and spread          the butter under the skin.
• Now stuff the neck end of the turkey with some of the stuffing.
• Stuff the cavity of the turkey with the lemon, onion, garlic, bay leafs and rosemary or thyme.
• Place the turkey into a roasting tray. Pour 100ml of water into the tray.
• Loosely wrap the turkey, ensuring the parcel is tightly sealed.
• Place in the oven and cook for 40 minutes at the high temperature.
• After 40 minutes, reduce the temperature to 170c/gas mark 3 and cook for a further 3 ¼   hours.
• After the 3 ¼ remove the foil from the turkey and increase the oven temperature to 200c/gas mark 6 and give the turkey a final 30 minutes, basting the trurkey occasionally. • This will ensure the turkey has a lovely golden colour.
• After the 30 minutes, pierce the thickest part of the turkey leg with a small knife and check that the juices run clear.
• Remove the turkey from the oven, wrap the tray lightly with foil and allow the turkey to rest for 30-40 minutes.
• Cooking times for other size turkeys
• 8-10 lb (3.5-4.5 kg) – 30 minutes at the high temperature, then 2 ½   hours at the lower temperature, then a final 30 minutes (uncovered) at gas mark 6, 400°F (200°C).
• 15-20 lb (6.75-9 kg) – 40 minutes at the high temperature, then 4 ¼  hours at the lower temperature, then a final 30 minutes (uncovered) at gas mark 6, 400°F (200°C).

Please bear in mind that ovens, and turkeys vary and the only way of knowing if a bird is ready is by using the test described above.

Christmas tip — Before roasting, remove the wish bone of the turkey. This makes carving the turkey easier.


Smoked bacon, sage and cranberry stuffing

Both stuffings makes enough stuffing for a 7kg (14-15lb) turkey. This stuffing is for cooking inside the turkey or roasting as individual balls of stuffing.

Ingredients

• 500g sausage meat

• 300g fresh breadcrumbs

• 300g cooked chestnuts, roughly chopped

• 150g butter

• 2 large onions, chopped

• 100g dried cranberries, finely chopped

• Salt and pepper

• 250g smoked bacon, chopped

• A good pinch of dried sage

Method

1.  Melt the butter in a pan and add bacon and add the onions, cranberries, dried sage and smoked bacon.

2.  Slowly cook, without colouring, until soft (approx 5-6minutes).

3.  Add the chestnuts and breadcrumbs and mix through well.

4.  Remove form the heat and allow too cool slightly.

5.  Mix through the sausage meat and season with salt and pepper.

Crispy Brie with a bacon & apple salad & cranberry dressing

Serves 4

Ingredients

• 12 pieces of Brie (small wedges)

• 4 tbsp lemon juice

• 200g fresh breadcumbs

• 6 tbsp olive oil

• 4 tbsp cranberry sauce

• 1 tsp of  honey

• 2  apples Mixed leaves

• 3 eggs

• 100g plain flour

• 3 back bacon rashers, grilled till crispy and then cut into thin strips.

Method

• Quarter, core and thinly slice the red apples.

• Place the apples in a bowl with the  lemon juice and 3 tbsp of water and toss well.
• Pre-heat your oven to 200c/gas mark 6/400f.
• Set up three bowls, 1 with the beaten egg, 1 with the flour and the final 1 with the bread crumbs.
• Pass the Brie though the flour, then the egg and finally the bread crumbs.
• Heat some sunflower or olive oil in a pan and fry the Brie on both sides until golden.
• Place on a baking sheet and bake in the oven for 2-3 minutes until the cheese is soft.
• Meanwhile to make the dressing, take the lemon juice from the apples and place in to a bowl.
• Add the cranberry sauce, olive oil and honey. Season with salt and pepper  and whisk to form a dressing.
• In a bowl, dress the leaves with some of the cranberry dressing and mix through the apples.
• Add the bacon to the leaves. (you can heat the bacon slightly if you wish)
• Arrange the leaves neatly on a plate and top with the Brie.
• Drizzle the remaining dressing around the plate.

Goose fat roast potatoes

Serves 8

Duck or goose fat is available form most supermarkets and is the best fat to use for roast potatoes.

Ingredients

• 2kg potatoes, peeled and cut to size (approx the size of an egg)

• 2tbsp flour

• 5 tbsp duck fat or sunflower oil

• salt and pepper

Method

• Place a large pan of salted water on the stove and bring to the boil.
• Add the potatoes, bring back to the boil and cook for 7 minutes.
• Drain the potatoes really well and sprinkle over the flour.
• Season with the salt and pepper. Place a lid back on the pan and give the pan a few hard shakes.
• Heat the oven to 180c. Spoon the fat into a large roasting tray and place in the oven for 6 minutes.
• Carefully pull out the tray and add the potatoes, giving them a couple of turns.
• Roast the potatoes for 40 minutes, turning a few times,  until golden and crisp.

Honey roast vegetables with balsamic vinegar

Serves 6

Ingredients

• 500g parsnips

• 500g carrots

• 500g turnip or celeriac

• 4 tbsp honey

• Pinch of dried mixed herbs

• Salt and pepper

• 4 tbsp of sunflower oil

• 2 tablespoons balsamic vinegar

Method

• Preheat the oven to 180c.
• Quarter the parsnips lengthwise and remove the woody core from the centre.
• Cut the carrots and turnip or celeriac into wedges approx the same size as the parsnips.
• Place in a roasting tray and drizzle with the olive oil and season with salt and pepper, sprinkle with the dried herbs.
• Cook in the oven for 35-40 minutes, stirring occasionally until tender.
• Remove from the oven, drizzle with the honey and balsamic and return to the oven for 2 minutes.

Chef’s tip — Try and purchase smaller parsnips as they tend to not be so woody.

Brussels sprouts with bacon and parmesan

Serves 6

Ingredients

• 1kg Brussels sprouts

• 1 tbsp unsalted butter

• 6 streaky bacon rashers cut into small strips

• 25g freshly grated parmesan

• Salt and pepper

Method

• Trim the sprouts and boil in salted water for 6-8 minutes then drain well.
• Heat a frying pan on a high heat and add the bacon. Cook until crispy.
• Add the sprouts and  butter, and cook for a further 2 minutes. Season with salt and pepper.

Glazed ham

Serves 10-12

Ingredients

• 3 kg piece of boned ham(boiled)

• Cloves for studding

• 120ml of orange juice

• 100g brown sugar

• 50ml Dijon mustard

• 75ml honey

Method

• Preheat the oven to 180c.
• Remove some of the fat from the ham and discard. Score the fat in a diamond pattern then stud a clove in the middle of each diamond.
• Place the ham in a roasting tray and add a liitle water to the tray.
• To make the glaze, place the orange juice, honey, sugar and mustard in a small saucepan over a medium heat.
• Simmer, stirring occasionally for 10-12 minutes until thickened.
• Brush the ham with the glaze and bake for 10 minutes.
• Glaze again and bake for another 10 minutes.
• Repeat and bake for a final 10 minutes.

Planning ahead
• Boil the ham on Christmas eve.

• Allow to cool and store in the fridge.

• Glaze the ham on Christmas day.

A larger ham may require more time.

Baileys and chocolate roulade

Chocolate roulade with Baileys cream & Maltezers

Serves 8

Ingredients

• 4 large eggs

• 100g caster sugar

• 65g self-raising flour

• 40g Cocoa powder

• 300ml cream

• 2 tablespoons Baileys

• 1 tablespoon icing sugar

• 1 bag of maltezers

Method

1. Preheat the oven to 200°C/gas 6. Grease and line a 33 x 23cm Swiss roll tin with baking parchment.
2. For the sponge, place the eggs and sugar together in a large bowl. Using an electric hand whisk, beat the mixture until it is pale, light and frothy.
3. Sieve the flour and cocoa powder into the bowl and carefully fold in to the egg mixture, using a metal spoon.

4. Pour in to the lined tin and spread out into the corners. Bake in the middle of the oven for about 8-10 minutes until firm and risen.
5. Place a piece of baking parchment bigger than the Swiss roll on the work surface. Invert the cake on to the paper and and peel away the baking parchment.
6. Roll up (from the longer edge) using the paper, rolling it up with the paper inside. Set aside to cool.

7. While the cake is cooling, whip the cream and then stir through the icing sugar and Baileys. Crush the maltezers lightly in the bag.

8. Once the cake is cool carefully unwrap, remove the paper and spread with the Baileys cream. Sprinkle with the crushed maltezers.

9. Roll back up and serve.

Red wine poached pears with Christmas pudding parfait

Serves 4

Ingredients

• 300g of Christmas pudding
• 125ml brandy

For the sabayon:
• 4 egg yolks
• 100g sugar
• Juice of 1 lemon
• 50ml sweet wine
• 300ml whipped cream, beat until it reaches the ribbon stage.

Method

• Mix all the sabayon ingredients together except the cream.  Place over a pan of simmering water  in a heat- proof bowl and whisk until thick and creamy.
• Remove from heat and whisk until cooled.
• Pour the brandy over the Christmas pudding and heat in the oven for 10 minutes.  • Remove and allow to cool for 5 minutes,  break up the Christmas pudding with a fork and with a spoon add the sabayon mixture ensuring that it is folded in well. Then fold in the whipped cream.  Pour into a terrine mould lined with clingfilm and freeze for at least 8 hours.

For the pears

• 750ml bottle red wine

• 4 tbsp caster sugar

• 2 cinnamon sticks

• ½ tsp cloves

• 2 slices of orange

• 4–6 ripe, but firm, pears, such as Williams (depending on size)

Method
• Pour the red wine in to a medium saucepan and add the sugar, spices, orange slices and  simmer gently for 15–20 minutes to allow the aromatics to infuse their flavours into the wine.
• Peel each pear, leaving the stalk on, and scoop out the core from the base with a melon baller. Gently lower the pears into the mulled wine. Rest a crumpled piece of greaseproof paper with a small hole cut out in the centre on top; this will help to keep the pears submerged in the liquid.
• Poach the pears for 10–20 minutes, depending on ripeness. To test, pierce with a fine metal skewer – it should meet with little resistance. Transfer the pears and mulled wine to a large dish and leave to cool. Cover with cling film and refrigerate overnight to allow the flavours to develop.
• Serve the pears warm, reheating them gently, or at room temperature, with the xmas pudding parfait.

Left over turkey stroganoff

Serves 4

Fed up with turkey sandwiches? Try this simple stroganoff for a tasty Stephens day treat.
Serve with rice or noodles.

Ingredients

• 2 tablespoons olive oil
• Small knob of butter
• 1 onion finely sliced
• 200g button mushrooms, finely sliced
• 2 garlic cloves, finely chopped
• ½ tbsp paprika
• 700g leftover cooked turkey, cut into strips
• 200ml Left over turkey gravy
• 1 tablespoon white wine vinegar
• 200ml cream
• 1 tbsp wholegrain mustard
• Chopped parsley to serve
• salt and pepper

Method

• Add the oil and butter to a heavy based frying pan, and place over a medium heat.
• Heat until the butter froths and then add the onions.
• Cook the onions for 3-4 minutes until soft.
• Add the mushrooms and garlic and cook for a further 3 minutes.
• Now stir in the paprika and cook for a further 1 minute.
• Add the turkey meat and gravy and bring to the boil.
• Add the white wine vinegar, Pour in the cream bring to the boil and simmer for 3-4 minutes until piping hot.
• Stir in the mustard and parsley, season with salt and pepper.

Serve with crusty bread and rice.

The Chef’s Table: Super Summer Dessert Recipes To Make Your Mouth Water

.

Mark Doe of Just Cooking cookery school in Firies has some amazing dessert recipes ideal for the summer…

Summer is a time for light desserts. Seasonal berries, rhubarb, lemon and orange based desserts go down a treat this time of year.

Kerry strawberries from a strawberry farm just up the road from the Just Cooking school are amazing when served with just a little cream.

When I have a punnet of them in the boot of the car, the whole car smells of sweet strawberries, something you don’t get from the imported varieties.

Here are some simple Summer dessert recipes for you to try this Summer. Enjoy them whilst the sunshine lasts.

Continued below…

.

Peach and almond tart

INGREDIENTS

plain flour, for dusting

500g block all-butter puff pastry

6 just-ripe peaches

140g butter, at room temperature

100g golden caster sugar, plus 1 tsp extra for sprinkling

140g ground almonds

1 large egg

finely grated zest 1 lemon

½ tsp almond extract

2 tbsp sweet sherry  (optional)

25g flaked almonds

METHOD

1. Heat oven to 200C/180C fan/gas 6. Line a large baking tray with baking parchment. On a lightly floured surface, roll out the pastry to a 3mm thickness. Cut a circle about 33cm in diameter with a sharp knife, using a plate or anything round as a guide. Using the rolling pin, transfer to the baking tray and score a circle 1cm in from the edge.

2/ Bake in the oven for 12-15 mins until lightly puffed and golden. Remove from the oven and gently push the centre down with the back of a large spoon so that you have a flat base with a raised border.

3.Meanwhile, halve and stone the peaches, then slice thinly. In a bowl, beat together the butter, sugar, ground almonds, egg, lemon zest, almond extract and sherry, if using. Spread the frangipane evenly over the pastry, leaving the border free. Top with the peach slices, neatly overlapping them in circles. Sprinkle over the remaining sugar and the flaked almonds.

4.Bake for 30 mins, then turn the oven down to 180C/160C fan/gas 4, cover the tart lightly with foil and cook for a further 30-40 mins. The frangipane should puff up between the peaches and be golden brown and set in the centre. Cool on a wire rack, then slice and serve

Lemon curd and yogurt fool

INGREDIENTS

300g jar lemon curd (we used Duchy Originals Traditional Lemon Curd)

500g tub  Greek yogurt

200g punnet raspberry

1 tbsp icing sugar

shortbread, to serve

METHOD

Put the lemon curd and yogurt into a bowl. Fold together for a rippled effect. Divide the mixture between four glasses and chill.

Mix raspberries and icing sugar together and gently crush, then spoon with their juices over the chilled mix and serve.

Strawberry and prosecco iced lollies

INGREDIENTS

400g ripe strawberries, stalks removed

2 tbsp caster sugar

4 tsp elderflower cordial

tsp lemon juice

200ml prosecco

7g tub freeze-dried strawberries (optional)

METHOD

Whizz the strawberries in a food processor with the caster sugar, elderflower and lemon juice.

Pass through sieve into a jug and stir in the prosecco. Pour into the lolly moulds leaving a 1/2 cm gap at the top to allow for expansion. Sprinkle the freeze-dried strawberries over the base if using.

Put the lollies in the freezer for 1 hr until the mixture is solid enough to support a lolly stick. Push a lolly stick 3/4 of the way into each lolly mould and freeze for another 6-8 hrs until solid.

To serve, pull each lolly out of the mould by the stick. If it doesn’t come free dip the mould in hot water for 10 secs and try again.

Alcoholic lollies melt quickly so serve straight away with a bowl or paper napkin to catch any drips.

To keep unmoulded lollies in the freezer, wrap each lolly in baking parchment and store in individual airtight freezer bags.

Strawberries with champagne sabayon- serves 4

You can also use any kind of sweet  wine or a cheap sparkling wine for this recipe.

I also sometimes use an Elderflower cordial or sparkling grape juice for a none alcoholic version. Serve the glazed strawberries with some delicate shortbread biscuits

INGREDIENTS

60ml champagne
65 g caster sugar
6 egg yolks
4 tbsp softly whipped cream

METHOD

1. In a large, heatproof bowl, whisk together the wine and sugar. Then whisk in the egg yolks.

2. Set to bowl over a pan of gently boiling water (the bottom of the bowl shouldn’t touch the water) and whisk vigorously until the mixture becomes frothy and stiff.

3. The sabayon is ready when the mixture is thick and holds its shape when you lift the whisk and let some of the mixture drop back into the bowl.

4. Once cooked fold through the whipped cream. Pile the berries and onto serving plates and top each with warm sabayon. If you like glaze the sabayon with a blow torch.

Lemon polenta cake with mascarpone cheese and lime

One of my favourite desserts and it really is very simple. Serves 4

INGREDIENTS

220g  butter, cut into pieces             250g caster sugar

4 eggs 3 lemons

125g polenta 125g self raising flour

1 small tub of mascarpone cheese Icing sugar

1 lime

1 x 20cm diameter baking tin, lightly buttered

METHOD

Have the butter at room temperature before starting.

Put the butter in a mixing bowl, add the sugar and beat until creamy and smooth.

Beat the eggs and beat into the mixture a little at a time. The mixture may separate at this stage, but don’t worry.

Grate the zest and squeeze the juice form 2 ½ of the lemons. Slice the remaining lemon half and set aside.

Add the lemon juice and zest to the cake mixture and mix well.

Add the polenta and flour and beat well until the cake mixture is smooth.

Spoon the mix into your prepared baking tin. Arrange the reserved lemon slices around the middle of the cake.

Bake in a preheated  oven at 180c (350f) gas mark 4, for 25 minutes.

Reduce the oven to 160c (325f) gas 3 and cook for a further 10 minutes until the cake is coming away from the edges of the tin.

Remove from the oven.

For the lime mascarpone, beat the mascarpone in a bowl until smooth.
Grate the zest of the lime into the mascarpone and mix through. Juice ½ the lime and mix through the mascarpone.

Sweeten the mascarpone to taste with some icing sugar.

Serve the cake hot or at room temperature with a spoon of the mascarpone

The Chef’s Table: Top Tips For A Healthier Diet

.

Mark Doe of the ‘Just Cooking’ Cookery School in Firies has some healthy recipes for January…

We all know the benefits of a healthy diet. You will certainly feel better if you watch what you eat.

It is so easy to open packet and jar of convenience foods, but they are often high in salt, sugar and additives.

If you haven’t heard of any of the ingredients in them, leave them in the shop!

Healthy food is so tasty and the goods news is it is usually very simple and quick to prepare.

Top  tips for a healthier diet

• Use a good quality non stick pan, this way you need less oil when cooking. Once the oil is added to the pan don’t let it smoke as the oil becomes unhealthy when this happens.

• Incorporate plenty of vegetables into your diet. The more colour on your plate the better.

• Instead of using processed meats for sandwiches, steam your own chicken fillets and have them in the fridge.

• Introduce seeds to your diet. Sesame seed – A wonderful antibacterial seed and high in Calcium, Flax seed – A seed abundant in Omega 3 and a wonderful cleaner for our digestive tract. Sunflower/pumpkin seeds – These seeds are packing a punch on the protein scale so another great addition to our daily diet. Dry fry the seeds in a dry frying pan and grind them in a mortar and pestle. This makes them easier to digest and releases the oils.

• To reduce salt in your diet use spices, garlic. lemon juice, black pepper or ginger to add flavour to your food.

• Snack on nuts, vegetable sticks or fruit.

• Avoid convenience foods as much as possible

Continued below…

.

What fats are bad?

Fat and cholesterol have a very important part in maintaining a healthy heart. But eating high fat foods regularly , especially foods high in saturated fats, tend to raise blood cholesterol levels.

Polyunsaturated fats can help lower blood cholesterol levels. Monounsaturated fats also have a lowering effect on blood cholesterol and are found in olive oil, peanut and rapeseed oil, as well as seeds, avocados and some nuts.

The total amount of fat eaten is important, so we need to limit all types of fat, especially saturated fats.

Salt

Research shows that salt intake contributes to an increase of blood pressure. Eating less salt is important for heart health.

Often people forget about the salt in prepared convenience foods. Herbs, spices, lemon, garlic and black pepper can be used as an alternative to salt.

Salmon and asparagus Fajitas

Serves 4

2tsp Olive oil 1 Medium onion, sliced

1 red pepper, sliced in strips 100g Asparagus spears, cut into 3 cm pieces

1tsp Ground cumin ¼tsp Cayenne pepper

4 Large tortilla wraps

200g Fresh salmon, skinned and cut into strips 50g  Rocket or baby spinach

Method

• Add the oil to a pan and place on a medium heat. Add  the onion, pepper and asparagus.

• Cook for 4 minutes, stirring regularly.

• Add cumin and cayenne pepper to the onions and peppers and mix well.

• Add the salmon to the onions, peppers and asparagus and mix gently for 2 minutes so it cooks evenly.

• Warm the wraps in the microwave or under a hot grill.

• Add the salmon to the onions, peppers and asparagus and mix gently for 2 minutes so it cooks evenly.

• Add a tablespoon to water, cover and turn off the heat.  Leave to stand for 1 minute.
Put ¼ of the mix and ¼ of the rocket into each tortilla. Roll up, cut in half and serve.

Pear & mango strudel

A healthy version of a strudel. Here we are using a little rapeseed oil instead of butter on the filo pastry.

Makes 1 large strudel, 6-8 portions

Ingredients

• 750g pears

• 2 Mangoes

• 50g ground almonds

• 50g honey (plus 3 tablespoons for drizzling)

• 4 tablespoons of Rapeseed oil (plus a little extra)

• Finely grated zest of 1 orange

• 6 sheets of filo pastry

• 1 tablespoon of flaked almonds

• Greek yoghurt for serving

Method

1. Preheat the oven to 190C/375F/Gas 5.

2. Peel core and thinly slice the pears. Peel, stone & finely dice the mangoes. In a bowl toss with the honey and ground almonds.

3. Mix the oil and the orange zest in a bowl.

4. Unroll the pastry and lay flat. Place 3 sheets of pastry. Long sides slightly overlapping, onto a work surface and brush lightly with the orange flavoured oil.

5. Cover with another 3 sheets of pastry, brush again, and repeat twice

6. Arrange the fruit in a narrow strip, lengthways down the centre of the pastry to within 3cm of each shorter edge.

7.Fold the 2 shorter edges over the filling and then fold over 1 long edge and tuck the fruit firmly underneath the pastry.

8. Brush with the remaining orange oil and fold over the other edge, so that it overlaps by at least 5-6 cm.

9. Carefully transfer the strudel to a large oiled baking sheet. Scatter with the almonds.

10.Bake for 35/40 minutes, until crisp and golden.

11. Warm the honey in a small pan or the microwave. Transfer the strudel to a board and slice. Serve drizzled with the warm honey & Greek style yoghurt.

Fruit Smoothies.

Fresh fruit is a really important part of our diets and if possible should be eaten at least once a day.

Below are two varieties of smoothies you can make. Of course you can choose whatever fruit you enjoy and mix and match according to what is available.

Creamy Banana and Pineapple Smoothie

1 banana chopped

5-6 pieces  fresh pineapple

2 dessert spoons plain yogurt

1 drop vanilla extract

Fresh apple juice to taste.

Red fruit Smoothie

1 Banana,

6-8 Fresh strawberries

Handful of fresh blueberries

2 Dessert spoons strawberry yogurt

Fresh apple juice to taste.

Method 

1.  Chop fruit on a clean chopping board. Make sure bowls and boards are clean as the fruit will pick up the flavours from the board very easily.

2.  Add liquid juice to dilute. Blend and serve.

Some reasons for eating Fresh fruit.

The vitamins in fresh fruit give you energy to help you get through the day.
Fresh fruit if eaten on a regular basis will help keep your skin looking fresh & clear.
Fruit is great snack, and will help to promote healthy weight.
Fresh fruit helps improve your digestion and prevents constipation.
Fresh fruit tastes great, and smoothies are a fun way to enjoy them.

Cod with tomatoes, thyme and peppers

A really quick and easy fish dish. I like to serve with brown rice or sweet potato wedges.

Ingredients

1 tbsp olive oil

1 onion , chopped

2 garlic cloves, finely chopped

400g can chopped tomatoes

1 heaped tsp light, soft brown sugar

few sprigs thyme , leaves stripped

1 tbsp soy sauce

1 red pepper, chopped

1 yellow pepper, chopped

4 cod , fillet portions approx 180-200g each( or another white flaky fish, such as Pollack)

Method 

• Heat the oil in a frying pan, add the onion, peppers and garlic, then gently fry for 5-8 mins until lightly browned. Stir in the tomatoes, sugar, thyme and soy, then bring to the boil.

• Simmer 5 mins, then slip the cod into the sauce. Cover and gently cook for 8-10 mins until the cod flakes easily.

Mackerel pate on tortilla bites with salsa

Tinned salmon can also be used for the pate

For the pate

1 tin of Mackerel (approx 100g)

2 tbsp low fat natural yogurt

50g extra light cream cheese (more if you want a creamier pate)

A little salt and pepper

A little lemon juice

Method 

• Drain the salmon and place in a bowl. Mash well with a fork.

• Add the cream cheese, yogurt and lemon juice.

• Mix well and season with a little salt and pepper

For the tortilla bites

2 light tortilla wraps

A little rape seed oil

Method

• Pre heat your oven to 180c.

• Brush the wraps on both sides with a little rape seed oil.

• Cut the wraps into triangles and spread out on a baking tray.

• Bake in the oven for 5-6 minutes until crisp.

For the salsa

1 packet cherry tomatoes

1 tbsp Tomato relish

1 tbsp chopped parsley

2 spring onions chopped

1 tbsp rape seed oil

A little salt and pepper

1 tsp Harissa paste

Method

• Combine all the ingredients together and serve with the pate and tortilla bites.

• Aromatic butter beans with pumpkin and pak choi.

• A mildly spiced, warming dish that is ready in no time and great for when you are hungry in a hurry!!

Serves 4

2 tbsp rapeseed oil 500g pumpkin or butternut squash, cut into small cubes)

60ml soy sauce 2  cans of cooked butter beans, drained and rinsed

1 red chilli, de-seeded and finely chopped

1 tbsp finely grated ginger 1 tsp Chinese five spice

2 heads of pak choi, cut into chunks 1 tbsp oyster sauce

4 spring onions, finely sliced 2 tbsp freshly chopped coriander

2 red onions, peeled and finely sliced 2 garlic cloves, finely crushed.

Method 

• Heat a wok over a medium high heat. Add the rape seed oil
• Add the onions and pumpkin and cook for 5-6 minutes, or until just tender.
• Add the soy sauce, oyster sauce, ginger, chilli, garlic, and five spice.
• Bring to the boil and simmer for 2 minutes.
• Add the pak choi, pumpkin mix and butter beans and simmer for a further 2 minutes.
• Serve and sprinkle with the chopped coriander and spring onions.

PHOTOS: Mark Cooks Up Some Treats At Parnells Fundraiser

Gaelcholaiste Insert 1
.
At the Tralee Parnells Mark Doe cookery demonstration in the Meadowlands were, from left: Samantha Palmer, Teresa Lonergan, and Kate Dunne. Photo by Gavin O'Connor.
At the Tralee Parnells Mark Doe cookery demonstration in the Meadowlands Hotel on Friday were, from left: Samantha Palmer, Teresa Lonergan, and Kate Dunne. Photo by Gavin O’Connor.

THERE was another great turnout for the Tralee Parnells annual cookery demonstration last night in the Meadowlands Hotel.

Mark Doe of Just Cooking cookery school in Firies cooked up some treats and gave his expert tips on the culinary arts.

The evening also featured a guest speaker on preventative strategies regarding sports injuries in the young hurler.

There were spot prizes during the evening and everyone went home happy, full of ideas for the kitchen and the club benefitted financially from the successful event.

Scroll down for photos…

Crag Santa Insert
.
At the Tralee Parnells Mark Doe cookery demonstration in the Meadowlands were, from left: Aoife O'Sullivan, Geraldine Laffan, Jenny Sheehy, Bernie Canty and Saoirse Maloney. Photo by Gavin O'Connor.
At the Tralee Parnells Mark Doe cookery demonstration in the Meadowlands Hotel on Friday night were, from left: Aoife O’Sullivan, Geraldine Laffan, Jenny Sheehy, Bernie Canty and Saoirse Moloney. Photo by Gavin O’Connor.
Aidan Kelly new insert 1
.
At the Tralee Parnells Mark Doe cookery demonstration in the Meadowlands were, from left, front: Graham Sheehy, Dara Moloney, Edward Sheehy and Jamie Fitzgerald. Back: Donal O'Brien and Jack O'Brien. Photo by Gavin O'Connor.
At the Tralee Parnells Mark Doe cookery demonstration in the Meadowlands Hotel on Friday were, from left, front: Graham Sheehy, Dara Moloney, Edward Sheehy and Jamie Fitzgerald. Back: Donal O’Brien and Jack O’Brien. Photo by Gavin O’Connor.
Ashe Ad Insert Ad
.
At the Tralee Parnells Mark Doe cookery demonstration in the Meadowlands were, from left: David Brick, Mark Ryall, Brian Shanahan. Photo by Gavin O'Connor.
At the Tralee Parnells Mark Doe cookery demonstration in the Meadowlands Hotel on Friday night were, from left: David Brick, Mark Ryall and Brian Shanahan. Photo by Gavin O’Connor.
At the Tralee Parnells Mark Doe cookery demonstration in the Meadowlands were, from left: Gerard O'Brien, Linda O'Brien and Seamus Cadogan. Photo by Gavin O'Connor.
At the Tralee Parnells Mark Doe cookery demonstration in the Meadowlands Hotel on Friday were, from left: Gerard O’Brien, Linda O’Brien and Seamus Cadogan. Photo by Gavin O’Connor.

Tralee CTC new Insert

At the Tralee Parnells Mark Doe cookery demonstration in the Meadowlands were, from left: Joan Naughton, Lil Hanifin, Josephine Casey and Joan O'Callaghan. Photo by Gavin O'Connor.
At the Tralee Parnells Mark Doe cookery demonstration in the Meadowlands Hotel on Friday were, from left: Joan Naughton, Lil Hanifin, Josephine Casey and Joan O’Callaghan. Photo by Gavin O’Connor.
At the Tralee Parnells Mark Doe cookery demonstration in the Meadowlands were, from left: Ruth Byrne and Eileen Falvey. Photo by Gavin O'Connor.
At the Tralee Parnells Mark Doe cookery demonstration in the Meadowlands Hotel on Friday were, from left: Ruth Byrne and Eileen Falvey. Photo by Gavin O’Connor.
At the Tralee Parnells Mark Doe cookery demonstration in the Meadowlands were, from left: Tara Donovan, Anne Donovan and Fiona Reidy. Photo by Gavin O'Connor.
At the Tralee Parnells Mark Doe cookery demonstration in the Meadowlands Hotel on Friday were, from left: Tara Donovan, Anne Donovan and Fiona Reidy. Photo by Gavin O’Connor.
At the Tralee Parnells Mark Doe cookery demonstration in the Meadowlands were, from left: Muirin Ni Loingsigh and Mary Ross. Photo by Gavin O'Connor.
At the Tralee Parnells Mark Doe cookery demonstration in the Meadowlands were, from left: Muireann Ní Loingsigh and Mary Ross. Photo by Gavin O’Connor.
At the Tralee Parnells Mark Doe cookery demonstration in the Meadowlands were, from left, Front: Cian O'Neil and Jack Doyle. Back: Katie Doyle, Finnuala English, Onaigh O'Neil. Photo by Gavin O'Connor.
At the Tralee Parnells Mark Doe cookery demonstration in the Meadowlands Hotel on Friday were, from left, Front: Cian O’Neill and Jack Doyle. Back: Katie Doyle, Fionnuala English, Onaigh O’Neill. Photo by Gavin O’Connor.

The Chef’s Table: A Barbecued Thai Treat


rsz_mark_doe_1Mark Doe of ‘Just Cooking’ Cookery School in Firies has a recipe for an Thai dish which can be cooked on the barbecue…

Thai Chicken Satay

Serves 4

Ingredients

• 3 chicken fillets cut into small strips the size of your little finger.

For the marinade:

• 1 lemon grass, smashed and chopped

• 2 shallots or ½ red onion, chopped

• 3 cloves garlic

• 1 red chilli finely chopped

• 1 thumb-size piece ginger, finely grated

• ½ tsp dried turmeric

• 1 tbsp ground coriander

Method

• If using wooden skewers, soak them in water while you prepare the chicken.

• Cut chicken into thin strips and place in a bowl.

• Place all marinade ingredients in a food processor or chopper. Process well.

• Pour the marainade over the meat and stir well to combine. Allow at least 1 hour for marinating, or longer (up to 24 hours).

• When ready to cook, thread meat onto the skewers.

• Grill the satay on your BBQ, or on under the  grill, and cook for 4-5 minutes on each side, occasionally basting the chicken.

Serve hot with the dipping sauce.

The Chef’s Table: The Salad Days Of Summer Are Here

Brogue Inn Insert
.

rsz_mark_doe_1Mark Doe of ‘Just Cooking’ cookery school in Firies tosses some delicious salad recipes together for summer days…

Be creative with your salads and use as much seasonal produce as you can.

A few tips for tasty salads;

• Wash and dry your salad leaves. A salad spinner is a great addition to your kitchen. A lot of the bags of salad that you can buy are washed but in a chlorine solution, so always give them another wash.

If your leaves are dried in a salad spinner they will last longer in your fridge.

• Warm salads are great, but adding warm food to leaf salads can wilt the leaves.

• Don’t overdress your salad as this can make the leaves soggy.

• It is best not to serve salads straight from the fridge. Potato salad, coleslaw etc… can be tasteless when too cold. Remove from the fridge 10 minutes before eating if possible.

• Try adding seasonal berries to salads. Watercress, beetroot and strawberry salad is a lovely Summer salad.

Continued below…

Fels Point Fathers Insert 1
.

Beetroot, orange and strawberry salad

Serves 4

Ingredients

• 4 heads of cooked beetroot, chopped
• 200g strawberries, washed and cut into quarters
• 2 oranges, peeled and cut into segments
• 1x 100g packet watercress

For the dressing

• 1 tbsp honey
• 1 teaspoon cumin seeds
• 1 teaspoon red wine vinegar
• 8 tbsp olive oil

Method

• Place the beetroot, orange and strawberries onto a large platter.
• Place the olive oil, cumin, honey and red wine vinegar into a jam jar with a tight fitting lid and give a good shake.
• When ready to serve sprinkle the watercress over the beetroot, strawberries and orange.
•Drizzle over the dressing.

Grilled peach salad with mozzarella and mint pesto

Serves 4

Ingredients

For the salad

• 2  ripe peaches

• 2 teaspoons olive oil

• 1 teaspoon balsamic vinegar

• 2 cups baby arugula

• fresh mozzarella, sliced mint & basil pesto:

• 30g of a mix of mint & basil

• 2 tbsp cup pine nuts, toasted (you could also use walnuts instead)

• 1/2 garlic clove, roughly chopped

• juice and zest from 1/2 a lemon

• 80ml olive oil (or more)

• A pinch of red chilli falkes

• salt & pepper

Instructions

• Slice the peaches into 6 segments per peach. In a small bowl, toss peaches with olive oil, balsamic, and just a small pinch of salt.
• Heat your grill (or grill pan) to medium high heat and brush it with some oil. Place the peach slices on the hot grill and cook each side for 2-3 minutes without moving them (near the end you can gently peek to see how your grill marks are coming along). When your peaches are grilled, set aside and allow them to cool to room temperature.
• Meanwhile make the pesto. Combine all ingredients in a small food processor and pulse to combine. Add more oil for a smoother pesto, or leave it chunky – whichever consistency you prefer.
• Toss the arugula with just a little bit of olive oil and a few pinches of salt. Assemble on a platter and top with mozzarella slices, peaches, dollops of pesto, and a few pinches of red pepper flakes. Squeeze just a bit of lemon on top and serve.

Quinoa and pomegranate salad

• 400ml chicken stock, from a low salt stock cube

• Extra-virgin olive oil

• 200g quinoa

• 1 medium garlic clove, finely chopped

• 1 red onion, finely chopped

• 85g raisins or sultanas

• 100g feta cheese, crumbled

• 200g pomegranates seeds from tub or fruit

85g toasted pine nuts or toasted flaked almonds

• 4 tbsp chopped parsley

• 5 tbsp chopped mint

• juice 1 or 2  of lemons

Method

• Place the chicken stock in a medium saucepan over medium-high heat and bring to a simmer. Add the quinoa.

• Cover the saucepan, reduce the heat to low, and cook until all of the liquid is absorbed, about 12-15 minutes, stirring once or twice. . cooked spread over a platter or wide, shallow bowl to cool quickly.

• When the quinoa is just about cool stir through all of the remaining ingredients with plenty of seasoning.

Thai carrot and radish salad

Serves 4

Ingredients

• 4 tbsp sweet chilli dipping sauce

• zest 1 lime and 2 tbsp juice

• 1 tsp fish sauce

• 1 Little Gem lettuce, separated into leaves

• 2 carrots, cut into thin batons

• 10 radishes, sliced

• 4 spring onions, cut on the diagonal

• handful roughly chopped coriander

Method

• Mix the chilli sauce with the lime zest and juice, and fish sauce to make the dressing.

• Arrange the lettuce in a large salad bowl. Toss all the remaining ingredients with the dressing just before you are ready to eat, to keep everything crisp and fresh, then add to the lettuce.

The Chef’s Table: Some Sizzling Stir-Fry Recipes


rsz_mark_doe_1Mark Doe of ‘Just Cooking’ Cookery School in Firies has some amazing stir-fry recipes to liven up meal times…

Stir-frying is a quick and tasty style of cooking that is also very versatile.

Any prime cut of meat and most fish can be stir-fried and all vegetables as long as they are cut thinly.

Top tips for a super stir-fry

Have all your ingredients chopped and at the ready including the sauce of your choice.

If you’re using cornflour to thicken your sauce, add it to the cold liquid otherwise it will go lumpy.

Stir again just before using.

• Use a wok if you have one and because it needs to be hot, use an oil with a high smoking point, like groundnut, sunflower or rapeseed.

• Heat the wok well before adding the oil.

• Cook the meat/fish for a few minutes then remove from the wok. Then stirfry the vegetables.

• Cook the vegetables and cook to your liking. Firm vegetables like carrots, peppers and thick broccoli stalks will take longer. Leafy vegetables like spinach and bok choy as well as beansprouts can go in towards the end.

• Don’t overload the wok. If cooking for larger numbers, cook the food in batches and then mix together in the wok before serving.

Zingy chicken stir-fry with egg noodles

Serves 2

Ingredients:

• 2 portions egg noodles

• 4 tbsp sunflower, groundnut or stir-fry oil

• 2 cooked chicken breasts, finely sliced

• 1 carrot, grated

• 1 pkt baby corn

• 2 garlic cloves, chopped

• 2 tbsp clear honey

• 1 tbsp soy sauce

• juice 2 limes

• 3 tbsp toasted sesame seeds

• 2 tbsp chopped coriander leaves

Method

• Cook the noodles according to pack instructions, then drain. Heat the 2 tsp of the  oil in a wok and add the chicken.

• Stirfry for 3-4 minutes until just cooked. Remove from the wok and set aside.

• Add the remaining oil and heat. Stir-fry the carrot, baby corn and garlic.

• Add the honey, soy and lime juice, bubble for 30 secs, then add the noodles and sesame seeds.

• Mix well, heat through and sprinkle with coriander to serve.

Pork  Stir-fry with oyster sauce

Serves 2

Ingredients

• 2 pork cut into very thin strips

• 1 packet of cooked egg noodles

• 4 tablespoons of peanut, groundnut, sunflower or stir fry oil

• 1 head of broccoli, cut into small florets

• 1 Large carrot cut into thin strips(or coarsely grated)

• 1 Red pepper, de-seeded and cut into strips

• 1 Green pepper, de-seeded and cut into strips

• 3 Cloves of garlic, crushed

• 1 bunch of spring onions, finely sliced

For the sauce

• 1 Sachet of ouster sauce (Blue dragon sachet)

• 8 tablespoons of soy sauce

• 16 tablespoons of water

• 1 Tablespoon of corn flour mixed with 4 tablespoons of cold water

Method

1. Cook the noodles following the instructions on the packet.

2. Cool down the noodles under running cold water and set aside.

3. In a bowl mix together the soy sauce, oyster sauce and water.

4. Heat a wok or large frying pan and add ½ of the peanut or ground nut oil. Heat until a haze forms above the pan.

5. Add the pork and stir-fry for 3-4 minutes until the chicken is brown and cooked through..

6. Remove from the pan and set aside. Wipe out the pan with kitchen paper and return to the heat.

7. Add the remaining peanut oil and heat again.

8. Add the carrot, broccoli, peppers, & garlic and stir fry for 3-4 minutes. The vegetables should stay crispy.

9. Add the spring onions and the soy & oyster sauce mix.

10. Bring to the boil and stir in the corn flour.

11 Add the noodles and pork and heat through

Thai Satay vegetable stir-fry

Serves 4

Method

• 4tbsp crunchy peanut butter

• 3 tbsp sweet chilli sauce

• 3 tbsp dark soy sauce

• 400g straight-to-wok noodles

•2 tbsp groundnut, sunflower or stir-fry oil

• thumb-sized piece of fresh root ginger, peeled and grated

• 400g mixed carrots, peppers, red onion, baby corn, mushrooms etc…(cut thinly)

• Handful basil leaves, roughly torn

• 25g unsalted roasted peanuts, roughly chopped

Method

• Mix the peanut butter, chilli sauce, 100ml water and soy sauce to make a smooth satay sauce.

•Put the noodles in a bowl and pour boiling water over them. Stir gently to separate, then drain thoroughly.

• Heat the oil in a wok, then add the ginger and vegetables. Stir-fry for 2-3 minutes until the veg is just cooked.

• Add the noodles then stir-fry for a further 1-2 minutes.

• Add the sauce and bring to the boil then sprinkle over the basil leaves and peanuts to serve.

Nasi Goreng

I first come across this tasty Malaysian rice dish whilst working onboard the QE2.

Spicy rice with meat or fish, topped with a fried egg and prawn crackers is something you will be hooked on once you try it.

I like to add lightly boiled green beans to the stirfry.

Dried shrimps are available from specialist Asian stores as are prawn crackers.

Serves 4

Ingredients

• 400g basmati rice, cooked and quickly cooled

• 1 leek, finely chopped

• 170g raw prawns, shelled and de-veined

• 2 chicken breasts, cut into thin strips

• 6 spring onions, finely sliced

• 2 handfuls fresh coriander, finely chopped

• 4 eggs

• 1tbsp ketap manis (sweet soy sauce)

• 6 large shallots, finely sliced

• 12tbsp Ground nut, sunflower or stir-fry oil

For the paste:

• 100g dried prawns, soaked for 15min in water

• 6 garlic cloves, chopped

• 4 red bird’s eye chillies, chopped

• 50g unsalted peanuts, chopped

• 3cm piece of fresh root ginger, peeled and roughly chopped

• Soak the dried shrimps in a cup of water for 15min.

Method

• Heat a frying pan over a moderate heat and add 8 tbsp of the oil. Heat until the oil is very hot but not smoking.

• Add the shallots and fry until golden brown. Drain the shallots on kitchen paper and allow to cool and crispen.

• Now make your paste. Place all of the ingredients into a blender and blend to a paste.
You can add a little of the water from the prawns to help the paste blend.

• Heat the remaining oil in a large frying pan or wok on medium heat. Spoon the paste into the pan and stir fry until lightly browned and fragrant.

• Add the leeks and chicken and fry for a few minutes until cooked, adding a little more  oil if needed. Finally, tip in the prawns and cook until they’re pink, which should take about 3-4 minutes.

• Lower the heat slightly under the wok and quickly stir in the rice, mixing well.

• Add the ketap manis, stir and season with salt and pepper.

• Now fry your eggs in a separate pan.

• Stir the spring onions and coriander into the rice dish.

• Divide between four plates. Garnish each with a fried egg and the shallots. Serve with a basket of prawn crackers.

The Chef’s Table: Barbecue Season Is Coming Again…We Hope!


rsz_mark_doe_1Mark Doe from ‘Just Cooking’ Cookery School in Firies has some great tips for barbecuing this summer. All we need now is the weather…

Planning your barbecue

Firing up the barbecue is often seen as an opportunity for a bit of a party with neighbours or friends, but few of us have a barbecue big enough to cook all the food at once.

It’s a good idea to pre-cook some of it in the oven, especially the likes of chicken wings or drum sticks and then just reheat it on the barbecue to impart that wonderful smoky flavour – but make sure it’s piping hot and thoroughly cooked through before you serve it.

Aim for two or three different main course choices then have lots of salads and bread on hand for people to help themselves to.

Don’t keep food hanging around for ages getting warm while it’s waiting for its turn over the coals.

The exception is large pieces of meat: these should be taken out of the fridge about 30 minutes before cooking so they can come back to room temperature, helping them to cook all the way through more easily.

Top barbecue tips

• Do not leave food out in the sun before cooking. Remove the food from the fridge 30 minutes before cooking to allow to come to room temperature.

• Always soak bamboo skewers in water for at least 30 minutes before using. This prevents them from catching alight and also splintering.

• Try not to pack food too tightly on the skewers. Leave some gaps around each piece so that the food will cook through thoroughly.


• Have a spray bottle of water ready to spray out any flames if they appear.

• Firm fish such as tuna or salmon can be cooked directly on the grill if handled carefully. A hinged wire fish basket can be useful when cooking more delicate fish or whole fish ,or try wrapping in tinfoil.

• Poking and stabbing the meat will cause the loss of juices that keep your meat moist and tender. Do not attempt to turn the meat with a carving fork. Instead use long handled tongs or spatulas to turn the meat.

• Only cook 2-3 items on the barbecue. Serve plenty of baked potatoes, bread and salad to compliment the barbecued food.

• Smaller portions of meat cook easier. Chicken wings, chicken escalope’s, minutes steaks etc… avoid chicken legs

Marinated Chicken escalopes

Serves 4 to 6

Marinade

• 2 tablespoons soy sauce

• 6 tablespoons  olive oil

• 2 tablespoons fresh lemon juice

• 1/2 tablespoons Dijon mustard

• 1 teaspoon ground cumin

• 2 garlic cloves, finely chopped

• freshly ground black pepper

• 4 boneless, skinless chicken breast halves, each about 6 ounces

Method

• Cut each chicken fillet in half lengthways and place each piece between 2 sheets of cling film.

• Lightly bat the chicken out with a rolling pin so that you have 4 pieces thin chicken escalopes.

• In a medium bowl combine the marinade ingredients. Place the chicken in a large resealable plastic bag and pour in the marinade. Press the air out of the bag and seal tightly. Turn the bag to distribute the marinade, place in a bowl, and refrigerate for 2 to 4 hours.

• Remove the chicken from the bag. BBQ the chicken over a high heat with the lid closed as much as possible, until the meat is firm to the touch and opaque all the way to the center, 2-3 minutes on each side is sufficient.

Grilled Pineapple with Honey and lime yogurt

Serves 8

For the pineapple

• 8 slices fresh pineapple, each about 1/2 inch thick, peeled and cored

• 2 tablespoons soft brown sugar

• 1/4teaspoon ground cinnamon

For the yogurt

• 150g low fat natural yogurt

• 2 limes, finely zested

• 1 tbsp honey

Method

1. Mix the yogurt, lime zest and honey together in a bowl.

2. Sprinkle the pineapple slices evenly on both sides with the brown sugar and cinnamon

3. Brush the cooking grates clean. Grill the pineapple slices over direct medium heat, with the lid open, 5 to 7 minutes, turning once.

4. Serve with the yogurt.

The Chef’s Table: A Bit Of Thai To Die For


rsz_mark_doe_1Mark Doe of ‘Just Cooking’ cookery school in Firies has a recipe for fantastic fish cakes…

Thai food is one of my favourite foods to cook.  It is so unique in taste as you often have salty, sweet, spicy and citrusy in one dish.

Thai fish cakes are simple and a fantastic example of Thai food. These little fish cakes make a great starter, main course or pre dinner nibble.

Serve with sweet chilli sauce to dip the fish cakes.

Thai fish cakes 1Thai Fish cakes with cucumber salad

Serves 4 as a starter

For the fish cakes

• 400g white fish fillets

• 2 red chillies, chopped

• 2 tbsp coriander

• 3 sliced scallions finely chopped

• 1 red pepper, chopped

• 2 cloves garlic, chopped

• 1 stalk lemon grass, tender part only, chopped

• 1 tbsp fish sauce

• Pinch salt

• Sunflower oil to deep fry

For the Thai cucumber salad 

• 1 cucumber peeled, halved lengthways and de-seeded

• 35g caster sugar

• 50ml rice wine vinegar (or white wine vinegar)

• 1 or 2 red chillies, finely diced

• 2 shallots finely diced (or ¼ of a red onion)

• 2 tbsp chopped coriander leaves

• 40g peanuts chopped

• ½ tbsp fish sauce

For the fish cakes

1. Cut the fish into small pieces. Place the red pepper, chillies, coriander, spring onions, garlic, lemongrass and fish sauce into a food processor and blend to a paste.

2. Add the fish pieces to the paste and blend well.

3. Chill for at least ½ an hour

4. Shape the chilled paste into small patties. Deep fry in hot sunlower until crisp and brown. Drain on kitchen paper.

For the salad

1.  Cut the cucumber in to ¼ inch slices

2.  Over a low heat dissolve the sugar in the vinegar, allow to cool and toss the cucumber slices in it. Mix in  the chilli, shallot, fish sauce and coriander.

3. Sprinkle with the peanuts just before serving.

The Chef’s Table: Like Pasta? Then You’ll Love This Dish

fels_teen_1

rsz_mark_doe_1Mark Doe of ‘Just Cooking’ cookery school in Firies has something special for pasta lovers…

CONTINUING the theme of healthier eating, this week I have shared a lovely pasta dish that is a hit in our house, as is most Italian food.

Olive oil-based pasta sauces are much healthier than creamy ones and compliment freshly made pasta perfectly, if you want to be adventurous and pull out your pasta machine.

Continued below…

blasket insert new

You can replace the chorizo with Italian sausage if you wish.

If you don’t make your own pesto, ensure you purchase a fresh one rather than the cheaper processed ones that sit on supermarket shelves.

Tagliatelle With cherry Tomatoes, Basil, Black Olives & Chorizo sausage.

Serves 2

Ingredients

• 250g Tagliatelle pasta, fresh or dried

• 2 Cloves of garlic, peeled and finely crushed.

• 100g Chorizo sausage finely diced

• 5 tbsp extra virgin olive oil

• 3 tbsp fresh pesto

• 12 cherry tomatoes, cut into ¼’s

• 10 Pitted black olives cut in half

• Salt & pepper to season

• Grated fresh parmesan to serve

Method

Cook the pasta as per the packet instructions.

Meanwhile take a large frying pan (or saucepan) place on a medium heat, add the garlic and chorizo sausage.

• Fry gently until the chorizo is a little crispy.

• Add the Extra virgin oil, pesto, cherry tomatoes and black olives and stir in.

• Drain and add  the pasta, toss off well and season with salt and pepper.

• Serve in bowls and top with fresh grated parmesan.

The Chef’s Table: A Quick And Tasty Dish For January


rsz_mark_doe_1Mark Doe of ‘Just Cooking’ cookery school in Firies, on a healthy dish for January…

If your new years resolution is to eat healthy, try this tasty chicken dish. Cheap, tasty, quick and healthy this recipe pushes all the buttons to start the year with a healthy diet.

Grilled Harissa chicken with a warm chilli, potato, pea  and tomato salad – serves 4

1 tablespoon paprika

1 tbsp harissa paste, mixed with 3 tbsp olive oil

Salt and freshly ground  pepper

4 skinless chicken fillets, cut in half and lightly batted out between two sheets of cling film

1 mild red chilli, seeds removed, finely chopped

1  small red onion, thinly sliced

1 packet cherry tomatoes halved

500g cooked baby potatoes, cut into wedges

1 handful frozen peas (defrosted)

1 handful coriander leaves, coarsely chopped

2 tbsp mayonnaise

2 tbsp pumpkin seeds

Method

• Place the harissa and oil into a bowl and add the paprika. Spread half of the harissa all over the chicken. Cover and pop in the fridge for 2 hours.

• To cook the chicken, preheat a griddle pan over a high heat. When hot season the chicken with the a little salt and pepper.

• Grill the chicken for 3-4 minutes on each side.

• Meanwhile, heat a frying pan over a medium heat, and add a little olive oil. Add the chilli onions, peas and potatoes and cook for 2-3 minutes. Remove from the heat and add the tomatoes, coriander and mayonnaise.

• Serve the chicken with the salad and sprinkle over the pumpkin seeds.

The Chef’s Table: Having A Party? Then You Need To Read This

original kerry insert

rsz_mark_doe_1Mark Doe of ‘Just Cooking’ cookery school in Firies, gives some great tips for entertaining at Christmas…

Having friends and family over for a few drinks and nibbles is the perfect stress free way to entertain.

Finger food can be as impressive as a full dinner party and there is less preparation, cooking and washing up on the night!

Firstly here is my list of tips to a perfect finger food party.

Continued below…

abbey-eat

1. Invite your friends over later than you would for a dinner party. This means they will have eaten before arriving.

2. Let your guests know that you are having a informal nibbles and drinks party, so do don’t expect a 3 or 4 course meal.

3. Serve the finger food in stages, don’t serve it all at once.

4. Bread sticks and a dip make a great start to the evening, and a cheese board with biscuits is great for your guests to nibble on all night.

5. Work on around 4-5 types of nibbles and start with the more filling ones. For example some bread sticks with a fresh pesto dip is easy and filling.

6. I would always finish the evevning with something sweet. This adds a great suprise at the end of the evening and also lets your guests know that the food has come to an end.

Preparation is key to a stress free evening.
Happy cooking

Mark

See below for great finger food recipes

Destination Killarney insert

Cranberry And Sage Sausage rolls

• 375g bought ready-rolled puff pastry

• 200g sausage meat

•50g dried cranberries

• pinch dried sage

• 1 small egg, beaten

Method

1. Preheat the oven to 200C/400F/Gas 6.

2. Cut the pastry into 10 rectangles, about 7x10cm/2¾x4in.

3. Mix together the sausage meat, cranberries and sage.

4. Lay the sausage meat on the pastry pieces.

5. Roll the pastry over the sausage, brushing the join with the beaten egg to seal.

6. Place on a greased baking sheet, sealed-side down, and brush them with the egg to give a nice shiny glaze when cooked.

7. Cook in the oven for 20 minutes until golden and crispy, and eat as soon as they are cool enough or leave to cool completely on a wire rack.

Baked Camembert With Crisp Bread

Serves 16 as a finger food and 8 as a starter or cheese course

• 2 x 250g packs Camembert in boxes.

• 6 sprigs thyme, plus extra to serve

• 50g toasted walnuts of hazelnuts

• 4 tsp honey

• Crisp bread to serve (see recipe)

Method

1. Remove the cheeses from their boxes and peel away the wrappers.

2. Place the lids under their bases for support.

3. Return the cheeses to their boxes.

4. Score the top of each cheese in a criss-cross pattern with a sharp knife and use the tip to push the thyme into the cheese.

5. Preheat the oven to 190°C, gas mark 5.

6. Place the cheeses, in their boxes, on a baking sheet and bake for 20 minutes or until soft  in the centre.

7. Scatter the tops of the cheeses with the toasted walnuts, some more thyme leaves and a drizzle of honey.

8. Serve with the crisp bread  to dip.  Simply return the cheese to the oven if it starts to become solid again.


Crisp bread

Makes approx 20 pieces

• 1 par baked demi bagauette

• olive oil

• Sea salt flakes

• Freshly ground black pepper


Method

1. Pre-heat the oven to 200c/gas mark 6/400f.

2. Thinly slice the baguette at an angle. Place in a bowl, drizzle with some olive oil and toss, so that the bread slices are all evenly covered with the oil.

3. Place on a baking sheet, season with salt and pepper, bake in the oven until crisp and golden (approx 3-4 minutes).

4. Remove from the oven and leave to cool and crisp up on the tray.

• Stuck for a Christmas gift idea? ‘Just Cooking’ gift vouchers or Mark’s cookbook make a great stocking filler.

The Chef’s Table: The Perfect Vegetable For Christmas Lunch


rsz_mark_doe_1Our food writer, Mark Doe of ‘Just Cooking’ cookery school in Firies, on a great veg for this time of the year…

Parsnips are in season from the end of October until February and are great for Autumn and winter comfort food dishes.

They are the perfect compliment  for game birds and no Christmas lunch is complete without honey roasted parsnips.

Once the parsnips are roasted drizzle them with a little honey and balsamic vinegar and then place back in the oven for a few minutes.

Buying parsnips

• Parsnips should be firm to touch and dry.

• Frost increases the sweetness of the parsnip, but be aware of frost bitten ones.

• The woody core tends to be more apparent in larger parsnips.

Preparing parsnips

• Peel the parsnips with a vegetable peeler and remove the two ends with a small knife.

• Cut them into ¼’s and remove the woody core with a small knife.

• Wash the parsnips well.

Parsnip & apple soup with curry oil and sesame seeds.

This soup is great for entertaining. Make the soup in advance and then all you have to do is reheat it when needed.

I like to serve it with some pan-fried scallops for a really extravagant touch.

2 tablespoons olive oil2 tbsp curry powder

2 onions, peeled 25g unsalted butter

320g parsnips, thinly sliced 2 green apples; peeled

2 tbsp fresh coriander, chopped finely 1 -1.5 litre vegetable stock

100ml cream salt and freshly ground black pepper

100ml olive oil 4 large king scallops, orange roe removed

25g unsalted butter 2 tbsp of sesame seeds, toasted

METHOD

• To make the curry oil. Heat the olive oil in a heavy based saucepan over a moderate heat, stir in the curry powder.

• Simmer slowly for 10 minutes then remove from the heat and allow to cool overnight.

• Roughly chop the onions & parsnips.

• Core the apples and rouhgly chop.

• Add the butter to a thick bottom saucepan and place on a medium heat.

• Add the parsnips, onions and apples to the pan and gently cook, without colour for 10-12 minutes or until the vegetables are softened.

• Add the stock and bring to the boil and simmer for 20 minutes until the parsnips are fully cooked.

• Remove from the heat and allow to cool slightly, then puree in a liduidizer or food processor.

• Transfer back to the pan, reheat and season to taste. Finish with the cream and bring back to the boil.

• Garnish sprinkled with chopped coriander and toasted sesame seeds.

The Chef’s Table: The Ugly Vegetable That’s Beautiful On The Inside

Roundys insert

rsz_mark_doe_1Mark Doe of ‘Just Cooking’ cooking school in Firies, on the ugly duckling of vegetables…

The poor old Celeriac certainly wasn’t at the front of the queue when good looks were being given out. But don’t let that but you off trying this ugly, but truly delicious and versatile vegetable.

In season form October to March, there is plenty of time to savour this root vegetable.

Celeriac has a delicate flavour of celery with a hint of parsley.

It is great used in stews or soups or finely grated and served in a winter salad. Celeriac when in season, was always on the menu at The Ritz, with fish or meat.

Continued below…

Abbey Inn

One of my favourite ways of preparing it whilst working there was as a creamy puree, finished with a little truffle oil and served with wild sea bass.

Try finely dicing or grating the Celeriac and binding it with a little mayonnaise. Add a squeeze of lemon juice, plenty of chopped parsley, some chopped capers and a little English mustard. Season with salt and pepper and serve with cold meats or smoked salmon.

When boiling potatoes for mash, add some Celeriac, it will cook in the same time as the potatoes. When cooked, drain well and mash with the potatoes. Season and add some cream and butter.

Buying Celeriac

I tend to purchase medium sized Celeriac as they are easier to prepare. Larger Celeriac tend to have holes in the centre. They should be firm, similar to a Turnip.

Preparing Celeriac

Remove the root (if present) with a sharp knife. Then peel with a sharp knife removing the skin.

Cooking

Celeriac can be boiled, steamed or roasted.

Celeriac soup with almonds

Serves 4

This has to be one of my favourite soups. Buy a small bottle of good quality truffle oil, you only need a little and it lasts for ages.

25 g butter

1 onion, peeled and finely chopped

1 garlic clove, finely chopped

2 large potatoes

1 large potato, peeled and roughly chopped

2 large potatoes, peeled and roughly chopped

1 litre vegetable stock

100ml cream

Salt and pepper

2 tbsp toasted, flaked almonds

• Over a medium heat, melt the butter in a large saucepan.

• Add the onion and garlic and cook slowly, stirring occasionally without browning, for 5 minutes.

• Add the celeriac and potatoes and cook for a further 2 minutes.

• Add the stock or water and bring to the boil. Simmer for 15 minutes until the celeriac is tender.

• Blend the soup in a liquidiser or with a hand blender.

• Return to the pan and bring to the boil.

• Add the cream and season with salt and pepper.

• Serve in soup bowls and sprinkle with the toasted almonds.

The Chef’s Table: Anyone For Squash?

Credit Union 600x400

rsz_mark_doe_1Our food writer, Mark Doe, on a vegetable which can go with most dishes – the Butternut Squash…

Butternut squash is a very versatile Autumn vegetable and if cooked properly (as in not boiled) is full of a lovely sweet flavour.

It can be used as a side vegetable to game as the sweetness complements the strong flavours of game birds wonderfully.

It is also great in risotto. A very popular starter during my time at The Ritz hotel, was roast squab pigeon, served on a butternut squash and truffle risotto.

The squash was roasted and then puréed. This was then mixed into a truffle risotto just before serving.
Butternut makes a divine autumn soup, and I often compliment the soup by adding some roasted parsnips as well.

Serve with a dollop of crème friache mixed with some toasted almonds. Some fresh chopped sage sprinkled on top when serving really enhances the flavour.

Try using in a stew or casserole. It makes a change from using carrot and turnip. I have never met a vegetarian that doesn’t appreciate a starter of roasted butternut with parmesan, rocket leaves and extra virgin olive oil & it is great cook on the barbecue.

Purchasing

Try and purchase samller squash as they are easier to prepare.

When purchasing squash they shouldn’t feel too heavy for their size and test them by trying to press your fingernail into the flesh.

Preparing

To prepare the squash for roasting, cut the squash in half so that you have the bulbous end and the thin end.

Place each piece standing up on a chopping board and then remove the rind with a small knife.

Cut both pieces in half length ways and you will see the bulbous ends contains seeds.

Remove the seeds with a spoon. These can be washed and then roasted in a hot oven if you wish.

Cut the squash into wedges and it is ready for roasting.

Roast butternut squash soup with almonds, crème friache and truffle oil

Chopped fresh sage served on top of the soup just before serving really enhances the soup.

Serves 6

• 1 kg of butternut squash2 tbsp truffle oil

• 1 tablespoon of finely grated orange zest 3 tbsp toasted flaked almonds

• 1 large onion, finely chopped

• 900 ml of vegetable stock or water

• 150 ml of crème fraiche

• Salt and pepper

• 25 g unsalted butter or olive oil

• Olive oil

Method

1. Prepare the squash for roasting as described above.

2. Place then on a roasting tray and drizzle some olive oil. Season with salt and pepper.

3. Place the squash in a pre-heated oven at 190-200c and roast until tender, approx 30-40 minutes.

4. Once the squash is cooked, melt the butter in a pan and sweat down the onion over a low heat, with out any colour for 4 minutes.

5. Add the orange zest and the vegetable stock.

6. Add the squash and bring to the boil.

7. Simmer for 10 minutes.

8. Blitz the soup in a liquidizer or with a small hand blender.

9. Season with salt and pepper and add the crème friache.

10. Re-boil the soup, if it seems a little thick add some more water or vegetable stock. Season with salt & pepper. Serve in soup bowls.

11. Drizzle each soup with a little truffle oil and sprinkle with a few toasted flaked almonds.

The Chef’s Table: Get The Most Out Of Oysters

jasmine 1-2

rsz_mark_doe_1Oysters are in season and our food writer, Mark Doe of ‘Just Cooking’ in Firies, describes how to buy, open and cook them to perfection… 

Oysters, you either love them or hate them.

I haven’t always liked oysters, but discovered how good they are whilst working in Australia.

Australia now has its feet firmly stood on the culinary world and has a very unique and exciting style of Cuisine. A lot of the Pacific Rim cuisine has now been dumbed down  and Asian flavours are now being sensibly used.

Continued below…

Blasket ad

Oysters were very cheap over there so, on my days off, I would head to the food markets and buy a dozen.

Sometimes I would just eat them raw, with a glass of chilled white (Cloudy Bay, Chardonnay from New Zealand was always a favourite of mine) or maybe just grill them in the half shell with a little soy sauce, finely chopped scallion, finely grated ginger and coriander.

Most people are put of by the fact they can be eaten raw and never try them. But they take on a whole different texture and taste once lightly cooked.

I was born in Colchester in Essex and apart from Essex girls and Maldon sea salt; it is also home to some of the best oysters around.

Colchester Oysters are fished from Mersea Island and are eagerly awaited by the some of the UK’s finest restaurants and hotels.

In Ireland, Galway oysters are celebrated every year in September at the Galway Oyster festival where thousands of oysters are consumed over the four days.

Although available all year round, oysters are at their best in season from September to March.

Opening oysters.

This can be tricky and requires a little practice to avoid breaking any shell in to the oyster. You will need a good oyster knife with a guard and a tea towel.

Chefs often use a chain mail glove to prevent them stabbing themselves if the knife slips.

• Place the oyster in a folded tea towel, with the flat side facing upwards, and fold it over the oyster.

• Place the hinge of the oyster towards you and place a hand on top of the tea towel.

• Now push the oyster knife into the hinge of the oyster until it goes through the shell. You will have to push quite hard and twisting the knife back and forth a little helps.

• Once the knife is through the hinge give it a twist and the shell will loosen.

• Now run the knife carefully around the whole edge of the oyster and the top shell will come away.

• Run the knife gently under the oyster to release it form the shell.

• Remove any shell and serve.

Purchasing oysters

As with mussels, scallops and clams, only purchase oysters that are fully closed.

If they are open they are dead and should not be consumed.

Store the oysters in a fridge uncovered, preferably on a bed of crushed ice on a tray.

I have chosen a hot oyster recipe, but served raw they are best with a wedge of lemon, some brown soda bread and a pint of Guinness.

Also try them with a good quality balsamic vinegar mixed with some finely chopped shallot.

Grilled Oysters with soy sauce, ginger, scallions and coriander.

Serves 12

• 24 oysters, opened and kept in the half shell

• 4 tablespoons of chopped coriander

• 8 tablespoons of light soy sauce

• ½ tablespoon of finely grated fresh ginger

• Juice of 1 lime

• 4 scallions (spring onions), finely sliced

In a small bowl mix together the soy sauce, coriander, scallions, lime juice and ginger.

Place the opened oysters on a baking sheet. (A good layer of salt placed on the baking sheet will stop the oysters toppling over)

Spoon each oyster with some of the soy sauce mix.

Pre-heat your grill to a high setting.

Place the oysters under the grill and cook for 2-3 minutes until they are just cooked.

Serve.


The Chef’s Table: Mmmm…Chocolate!

Kerins 4

rsz_mark_doe_1Our food expert, Mark Doe of ‘Just Cooking’ in Firies, on the artistry involved in cooking with chocolate 

Working with chocolate is something that takes years of practice.

It takes a special kind of chef to work with chocolate. Like perfect chocolate masterpieces, they need to be cool and well tempered.

I have been lucky enough to have worked in five-star hotels, that have specialised temperature and humidity controlled chocolate rooms, where a chef will work with chocolate.

They are always very cool headed; surprisingly slim and they live and breathe chocolate, yet  they won’t give much away about their craft.

Continued below…

Blasket ad

Amazingly they always seem to have the cleanest chefs uniform in the kitchen!

I remember as a young chef, watching in awe as they produced amazing sculptures, perfect tortes and delicate petit fours.

Occasionally I would sneak into the chocolate room and help myself to a few petit fours and the smell is still one of my fondest memories of working in London.

The patience required to perfectly temper chocolate is a skill that very few chefs have or fully understand.

I have worked with chocolate over many years and the many uses of it and the skill required to produce it still amazes me.

So here’s a simple recipe for easy chocolate mousse.

Try adding some Baileys to the mousse and sprinkle with chopped hazelnuts before serving. Everyone loves this mousse and it takes no time to produce.

Serves 4-6

200g good quality milk chocolate

200 ml ready made custard

250ml  cream

1. Melt the chocolate in a heatproof bowl set over a pan of Simmering water.

2. Once melted remove from the pan and allow to cool slightly.

3. Whip the cream until soft peaks are formed.

4. Place the custard in a bowl and whisk in the melted chocolate. Whisk until completely combined.

5.   Gently stir through the whipped cream and spoon into 6 ramekins or martini glasses.

7.   Place in the fridge for at least one hour to set.

The Chef’s Table: A Perfect Recipe For Autumn/Winter

Streat Ad ladies lunch

rsz_mark_doe_1Mark Doe of ‘Just Cooking’ In Firies, has a great recipe for braised red cabbage…

With the Autumn here and Winter just around the corner, I thought now is the perfect time to share my braised red cabbage recipe with you all.

I love to serve this cabbage with game, duck or pork. 
It is also great served cold with cold meats or cheese.

 Also, try adding some chopped apple and sultanas whilst cooking the cabbage.

Braised red cabbage

• ½  head of red cabbage
• 450ml fresh orange juice
• 25g  brown sugar
• ½  cinnamon stick
• 100ml red wine
• 3 tbsp balsamic vinegar
• Salt and pepper
• 2 tablespoons of red currant jelly

1. Cut the red cabbage into 1/4s through the stalk.

2. Remove the first layer of tough outer leaves and then with a small knife remove the core from each ¼.

3.  Finely shred the cabbage as finely as possible.

4.  Place the cabbage in a large saucepan and add the orange juice, brown sugar,   balsamic vinegar and wine.

5. Cover with a disc of grease proof paper and bring to the boil.

6. Reduce to a slow simmer and cook until the cabbage is soft and has absorbed all the liquid. This will take 60-70 minutes.

7. Stir in the red currant jelly whilst the cabbage is hot, season with salt and pepper and serve.


The Chef’s Table: Cooking Without Salt. A Chef’s Nightmare?

Streat Ad ladies lunch

rsz_mark_doe_1Our food writer, Mark Doe of ‘Just Cooking’ in Firies asks is cooking without salt really a nightmare for chefs?

OK, as I chef there is one thing I love in food, and it is the correct amount of salt.

Under-seasoned food can be bland and I often see people cringing when they see me season food here at Just Cooking!

I justify this by making the point that people very rarely add extra salt to the food once they taste it.

As taste is so personal, getting the seasoning correct to suit everybody can be a challenge for chefs.

Continued below…

Kerins 4

A few years back I was asked by TV Nutrition expert Paula Mee, to come up with a selection of dishes that were to contain no added salt. A big challenge to say the least!

And to add more pressure, a group of GPs were then brought out to the cookery school to see how the dishes were prepared and then tasted them.

That evening I had to lock the salt away just in case temptation got the better of me!

But once we heard some of the statistics on salt consumption in Ireland, the challenge was set. 
One of the most concerning statistics Paula gave us was on cheaper sausages!.

Many children are brought up on sausages, mash and gravy, my own daughter loves this!. But did you know two cheap, poor quality sausages can contain up to six grammes of salt?

Then they may be covered in instant gravy, which can also be high in salt.
 This means a kids dinner can contain up to seven grammes of salt!

The RDA for a child is three grams of salt. Scary stuff. 
I would always purchase sausages with at least 80% meat content, avoid the cheaper pale looking ones.

The best way to reduce salt content is to avoid convenience foods. These can have a high salt and sugar content and are generally high in MSG.

Avoid certain brands of stock cubes that can be very high in salt.
 Also processed meats are high in salt. Since meeting Paula we now always have steamed chicken fillets in our fridge, that we use for sandwiches!

When cooking, experiment with spices, lemon juice, herbs, black pepper, ginger, chilli and garlic.
 A simple breast of chicken, grilled with lemon juice, garlic and plenty of black pepper is far from tasteless!

So get rid of that salt habit, and start cooking healthier food. If I can do it, anyone can!

Happy cooking


The Chef’s Table: A Great Thai Chicken Curry

Streat Ad ladies lunch

rsz_mark_doe_1THAI cookery has to be my favourite style of food.

I love the freshness and simplicity of the dishes.

 Thai food is unique in the fact that in many dishes you get spicy, sweet, citrusy and salty all in one dish.

During my time working in Australia, I worked with many Thai chefs and I was always amazed at how they managed to knock up quick dishes by using a few simple ingredients and spicing them up with chilli, ginger, sugar and lime.

Continued below…

Blasket ad

With a few Asian shops now in Kerry it has never been easier the get hold of the ingredients needed, having said that most supermarkets now have the basic ingredients available.

Thai green curry is a very popular home cooked meal in Ireland, and once you have tried cooking it, you can see why. It is quick, fresh and much tastier than any of the shop-brought versions.

Once you have the green curry paste made you can freeze it in batches.

Green chicken curry

Serves 4

For the curry paste:

1 stalk lemongrass (the white part only), chopped
1-2 green chillies, de-seeded 
 2 cloves of garlic, crushed
1 tbsp ground coriander
1 tbsp Thai fish sauce
1 tsp sugar
15g Fresh Basil
15g Fresh coriander
1 thumb-size piece of ginger, peeled and sliced
Grated zest of 1 lime

For the curry:

1tbsp vegetable oil
4 skinned chicken breasts, cut into strips
1 onion, finely sliced
2-3 tbsp of green curry paste (see above)
400 ml coconut milk
Chopped coriander to serve

• To make the curry paste, place the lemon grass, chillies and garlic in a food processor and blend until finely chopped.

• Add the remaining ingredients and blend to a fine paste.

• For the curry heat a wok or frying pan over a medium heat.

• Once hot add the chicken and fry until the chicken is browned all over. Remove the chicken pieces from the pan. Add a little more oil to the pan and tip in the onions. Cook for 3-4 minutes until softened. Add the curry paste and cook for one minute.

• Pour in the coconut milk, bring to the boil, then turn the heat down and simmer for 10 minutes.

• Return the chicken to the casserole and simmer for 10 minutes, or until the chicken is cooked through. Serve and sprinkle with some fresh coriander.

The Chef’s Table: Why Do We Overcook Our Food?


rsz_mark_doe_1

Our food writer, Mark Doe of ‘Just Cooking’ in Firies, says people who overcook their food don’t know what their missing…

ONE thing that I have learnt over the years of teaching people to cook at our school is that the majority of home cooks cook their food to death.

Why is this?
 Well apart from lack of knowledge on understanding how long food takes to cook and the trend in a lot of Irish homes to eat everything well done, I also believe it is the fear of poisoning somebody!

My mother in law is a classic example of this, who, although she is a great cook, tends to cook lamb and beef to death. But this is how she was taught and comes from her past few generations.

Chefs hate well done beef, lamb, duck, game and fish. It is a no go area when training to become a chef. Everything must be cooked pink.

Fish is always over cooked, but in reality most fish can be eaten raw as the Japanese do with Sushi and Sashimi. 
Small fish fillets say from Mackerel, sea bass or sole take 2-3 minutes to cook in a hot fryingpan and the likes of salmon fillet portions take around 6-7 minutes.

You will notice a massive difference in the taste and texture of your fish if it isn’t overcooked. In fact, fresh tuna and salmon are fantastic slightly under cooked.

With prime cuts of red meat, I can understand why some people hate the sight of blood in their meat. But if you try and get over this mental block and think of the blood as juices rather than blood, I will guarantee that you will be hooked on meat that is cooked to medium rare or medium.

The difference is amazing; tender, moist and packed full of flavour. Something you do not get with overcooked red meats as in fillet steak.

Of course pork and poultry have to cooked well done due to the risk of salmonella poisoning, but once you reach a core temperature of 75c the meat is safe to consume with no pink juces.
You don’t have to cook the life out the meat.

Pork steak and chicken fillets tend to dry out a lot if over cooked as there is very little fat in the meat.

So instead of giving your meat or fish the usual five more minutes, try it without the extra time, I am sure you will be surprised.

Happy cooking!

The Chef’s Table: The Salad Days Of Autumn

Kerry ETB new

Our food columnist, Mark Doe of ‘Just Cooking’ in Firies, says salads don’t have to stop once summer is over…

rsz_mark_doe_1“SALADS? They’re rabbit food!” I hear you say!

Most people’s idea of a salad is limp lettuce with tasteless tomatoes and a bit of cucumber, but there is so much more to salads than this.

As we head into the Autumn there is many seasonal ingredients you can use to prepare a stunning salad.

Some of the seasonal produce around at the moment include plums, spring onions, artichokes, aubergine, fennel, beetroot and broad beans.

All of the above of packed full of flavour and work really well in salads.

Continued below…

Jasmine ad insert 1

The dressing is a vital part of any salad and they can be knocked up in seconds. A homemade dressing is so much better than a shop-bought one and a lot healthier.

For a basic dressing take 4 tablespoons of balsamic vinegar, 12 tablespoons of olive oil and 1 tablespoon of honey. Place in a jam jar with a tight fitting lid, season with salt and pepper and give a good shake.

You can spice the dressing up a little with some dried chillies, wholegrain mustard or toasted cumin seeds.

Continued below…

That's per

For a healthier dressing use some natural yogurt mixed with a little lemon juice and finely chopped garlic.

Warm salads are good also and one of my favourites is a salad of roast beetroot and sweet potato, finished with crumbled feta cheese and spring onions. Just dress before serving with the homemade dressing.

Another cracking warm salad is baby potatoes, boiled and kept warm. You can then add chopped spring onions, loads of chopped fresh parsley, a little horseradish sauce and dress lightly, again using the homemade dressing.

Whilst working at the Ritz hotel in London, the chefs used to quickly prepare salads for the chef’s staff meals.
 The salad got the name of “the anything salad”, as it was literally any leftover vegetables, potatoes meat or fish tossed with a dressing.

The dressing consisted of mayonnaise, garlic and parmesan which was thinned down to a creamy consistency with boiling water. It was really a quick Caesar dressing and it works with pretty much anything.

So why not try a few new ideas and try and keep the ingredients seasonal, because this is when they are at their best and usually locally farmed.

The Chef’s Table: I’m Not Quick To Complain In A Restaurant, But…


Jasmine ad insert 1

rsz_mark_doe_1

Our food columnist, Mark Doe, on complaining in a restaurant…

AS a chef, one of the questions I get asked frequently is “do you ever complain when in a restaurant?”

Because I am a chef, people seem to think that I am hard to please when it comes to food, and that when eating out I am very critical. This, to be honest, is a long way from the truth!

I have my favourite restaurants, some fine dining, some bistro and others for when you fancy a quick bite of lunch with the family.

I like food that is cooked with care and delivers what it says on the menu! Surely not too much to ask?

But the main thing I look for when I eat out is consistency. If I go out on a Saturday night and there is 100 people eating, or a on Monday night and there is four people eating, I expect the same standard of food.

Now I know this can be a tough task, but from working in some of the world’s top hotels and restaurants, I also know that it can be done.

I have worked on 5 star cruise ships where chefs are producing food for 2,800 people, 24 hours a day, in some very rough Atlantic seas and it has been consistent.

So why is it so hard for a small 60-cover restaurant?

Continued below…

Total Cleaning Supplies 1x

One of a few rare times that I have complained was I was in a restaurant a few years ago and ordered a medium-rare fillet steak.

It was a Thursday night and there was around 16 people in the restaurant. The chef was sitting at the bar, in his uniform with his buddies, leaving the kitchen in the hands of his team.

Now my steak came (at a price of €28.00) and was so well done it looked like a piece of charcoal (and tasted the same)!

I complained and the steak was taken back to the kitchen, whilst the chef still sat at the bar, unaware of what had happened.

Another steak was cooked and came back still over-cooked! At this stage I was so hungry I ate it!

What really got to me was the fact that the kitchen had no consistency whilst the chef wasn’t in the kitchen, and as a head chef he should ensure that the same standard of food goes out, even if he isn’t in the kitchen! Isn’t that what he is paid to do! Train the staff and manage the kitchen!

Now I don’t want to rant too much about this, but a head chef is paid a good wage to ensure the food goes out to a consistent standard always, however many customers are in the establishment.

The type of restaurants I tend to go back to do all the same thing well, food cooked well and food that represents the price paid for it.

So to answer the question of whether I complain, the answer is; very rarely unless I feel I am being ripped off.

Which luckily in Kerry is very rare as we are blessed with some amazing restaurants, bistros, cafes and bars.

Happy cooking!


The Chef’s Table: A Perfect Thai Dish

Darcys sidebar ad

rsz_mark_doe_1THAI food is one of my favourite cuisines in the world. 
Fresh, vibrant, flavorsome, quick and healthy makes it a great style of cooking.

What makes it so unique is the combination of spicy, salty, citrus and sweet flavours in most dishes.

 Ingredients are readily available from most supermarkets and Asian food shops.

Pad Thai (phat Thai) is the best I know of all Thai noodle dishes. Try using tiger prawns as well as the meat or keep it vegetarian.

Continued below…

Jasmine ad insert 1

OLYMPUS DIGITAL CAMERAServes 4

1 packet of straight to wok Thai ribbon noodles

2 tbsp of groundnut or sunflower oil

2 eggs beaten

2 chicken fillets, finely sliced

1-2 fresh red chillies, deseeded and finely chopped

2 garlic cloves, chopped

1 small piece of ginger, finely grated

3 tbsp of fish sauce

Juice of 1 lime

2 tsp of soft light brown sugar

115g of bean sprouts

4 tbsp of chopped fresh coriander

115g of unsalted peanuts, chopped 
4 spring onions finely sliced

Continued below…

The Streat new

• In a non stick pan, heat a little oil and make two thin pancakes with the beaten eggs.

• Allow the pancakes to cool and finely shred them.

• Heat the oil in a wok and stir fry the chicken for 4-5 minutes.

• Now add the garlic, chillies, and ginger and cook for a further 1-2 minutes.

• Add the noodles then cover with a lid or tin foil and cook for 1-2 minutes.

• Mix together the fish sauce, lime juice and sugar.

• Add the fish sauce mix to the wok.

• Stir in the bean sprouts, coriander, omelette and peanuts.

• Toss a few times in the wok and serve. Sprinkle with the spring onions.


The Chef’s Table: Mark Doe Picks His Favourite Cookbooks

Darcy's sidebar and main

rsz_mark_doe_1

Our food columnist, Mark Doe of Just Cooking in Firies looks at the cookbooks he has acquired down through the years…

I HAVE a lot of cook books, in fact I have been collecting them since I was 16.

I am not going 
to tell you how many years that is as I will then have to give away my age!

I have books from all the well known chefs and some from the not so well known. I have books from the Novelle cuisine era – where it was acceptable to serve three pools of fruit coulis on a plate as a dessert and sell it for a huge price – and books written in the 1950s from domestic science teachers.

One particular Irish cook book I have, written in the 1950’s has a chapter on how to make cough medicines!

Continued below…

rsz_roast_house_3

“Practical cookery” is the book that all trainee chefs learn from when they study at college and when you are learning it is the bible.

To this day I sometimes refer to it. 
The book is now on its 11th edition and has changed a lot since I owned a copy back in 1986. 
It sits proudly on my book case in the cookery school amongst some of the best cookery books ever written.

“White Heat” by Marco Pierre White was the book of my era! 
Sharp photos of amazing food alongside pictures of Marco and his team in the kitchen and the fantastic Marco quotes. I would guess that most chefs own a copy of this and if they don’t shame on them.

Continued below…

Jasmine ad insert 1

“Larousse Gastronomique” is an encyclopedia of gastronomy. Mainly based on French cuisine. it was first pubished in 1938 and today is over 1,300 pages.

This is one book that I feel I have used more than any other in my career.
 Everything you ever need to know about classical cuisine is in this book. 

The Fat duck and El Buli cook books are amazing stuff but you have to be a genius with some pretty expensive kit to pull of the recipes.

The Naked Chef is a book I love, as I do all of Jamie Oliver’s books. 
Jamie brought home cooking to an amazing level as before that home cookbooks were so dated.
 Jamie’s books would be the ones I use most when I look to entertain at home.

So out of the few hundred books that I own, what is my favourite you ask?

Well my grandmother gave me a cookbook called The “Lots of thing have changed in the kitchen since you last brought a Cookbook” Cookbook!

Written in 1970, it has a collection of recipes that can only be called classics; Beef wellington, sherry trifle, baked alsaka, lamb chops reform. The list is endless.
 But what I love about the book is this lovely piece on microwave ovens.

“Since microwave ovens are more expensive than a colour TV set, it is highly unlikely they will ever find a place in the modern home!”

I saw a microwave for sale the other day for €39.

How times have changed…as have cook books.

Happy cooking!


The Chef’s Table: You Gotta Love Those Temperamental Chefs


Darcy's sidebar and main

rsz_mark_doe_1Our food columnist, ‘Just Cooking’s’ Mark Doe, on how different chefs have their ways in the kitchen…

WE all know that some chefs have a reputation of being temperamental, and to a degree it is true.

I know when I ran kitchens I sometimes had my moments, so I have decided to try to explain why chefs can be like this, and to a degree defend them!

There is two types of chefs that I have worked with. The first being extremely passionate about what they do, extremely talented and at the top of their game.

These guys are what make the catering industry such a great industry. 
They develop young chefs into great chefs and any telling off you get from these guys is always justified and never personal! When you go into these chefs’ kitchens you know what to expect – they demand perfection and nothing but 100% is good enough!

If there are 80 covers (or more!) in the restaurant and the kitchen isn’t performing, they are going to turn up the pressure. There is no point going over to the chef preparing the starters and saying “now come on mate, you need to move a little bit tonight, people are waiting for ages now!”

What he is more likely to say is; “Table 2 have been waiting 20 minutes now. If you don’t move it you are going to have to reconsider your career and find another job!”

Continued below…

rsz_roast_house_3

What this will do is get the guy moving and if he is as passionate as the head chef, he will rise to it and become a better chef.

The other type of chef is the opposite!

They don’t have any passion, cannot cook and are not happy with their chosen career choice! In fact many of them hate it and would do anything to get out of it!

They often have a huge ego to mask their lack of talent and passion and when they kick off, they really kick off.
 This normally creates chaos in the kitchen and makes the situation worse!

These are the worst chefs to work with by far! And if you want a career in cooking, avoid them!

One guy I have the utmost respect for is David Nicholls, formerly the Executive Chef of The Ritz Hotel, London, now director of food and beverage at Mandarin Oriental.

I worked at The Ritz in London for three years, and loved it!
 He was a hard man to work for, a real perfectionist who didn’t suffer fools! But nothing was ever personal, and I learnt more from him than any other chef I have worked for.

I am not ashamed to say that he had me in tears on a couple of occasions, but I had messed up on busy nights and had put the whole kitchen in the, you know whats!

Continued below…

abbey_deals_ad

Even after these bad days. I would still be in the kitchen at 7am the following day for another 12-14 hour day! I believe that a certain amount of discipline is required in a kitchen, particularly at the higher level and it certainly never did me any harm.

So I hope this has shed a little like on cranky chefs and has not put any young people off from considering becoming a chef, because I can honestly say it is the best industry in the world.

Happy cooking!


The Chef’s Table: Cooking The Perfect Steak

rsz_roast_house_3Click on above ad for more

rsz_mark_doe_1Our food columnist, ‘Just Cooking’s’ Mark Doe, on the traditional favourite – a juicy steak…

Cooking the perfect steak is a lot easier than people make out. 
Okay it does take a little practice to test the degree of cooking by pressing the steak, but the more you cook steak the easier it becomes.

Firstly you need prime steak cuts such as fillet, striploin, rib eye or sirloin.
 Round steak etc… can be tough, especially when cooked well done.

Remove the steaks from the fridge 15 minutes before cooking.

 Resting the steak once cooked is vital to give you a tender steak.

Below is a recipe to cook the perfect fillet steak with garlic butter.

Fillet steak pictureFillet steak with garlic butter

For the steaks:

• 4 fillet steaks, trimmed, 7-8 oz each
• 2 tablespoons rapeseed or olive oil
• Sea salt and freshly ground black pepper
• For the garlic butter
• 50g butter, preferably unsalted
• 3 garlic cloves, finely chopped
• sea salt and freshly ground black pepper
2 tablespoons freshly chopped parsley

1. Firstly cook the steaks. It is best to remove them from the fridge 15 minutes before cooking. Heat a chargrill pan over a high heat until smoking hot.

2. Once the pan is hot, rub the steaks with a little oil and season on both sides with salt and pepper.

3. Place the steaks on the chargrill pan and sear well for 4 minutes, turn the steaks and sear for 4 minutes on the other side. This will give you a medium rare steak.

For medium cook for 5-6 minutes on each side.

For well done it is best to place the steaks in a hot oven (200C/gas mark 6/ fan 190C) after searing on each side. They can then be cooked for a further 8-9 minutes.

4. Once the steaks are cooked to the desired degree, remove them from the pan and rest on a warm plate whilst you make the garlic butter.

5. Add the butter and garlic and to a pan and place on a low heat. Allow the butter to gently melt. Add the chopped parsley and season with salt and pepper.

6. Serve the steaks and drizzle over the garlic butter.

Ch Opticians update